之前已经通过:
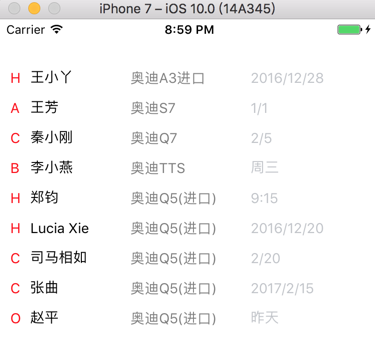
class AwesomeProject extends Component { // Initialize the hardcoded data constructor(props) { super(props); const ds = new ListView.DataSource({rowHasChanged: (r1, r2) => r1 !== r2}); this.state = { dataSource: ds.cloneWithRows([ { intentionLevel : "H", customerName : "王小丫", intentionCar : "奥迪A3进口", updateTime : "2016/12/28" }, { intentionLevel : "A", customerName : "王芳", intentionCar : "奥迪S7", updateTime : "1/1" }, { intentionLevel : "C", customerName : "秦小刚", intentionCar : "奥迪Q7", updateTime : "2/5" }, { intentionLevel : "B", customerName : "李小燕", intentionCar : "奥迪TTS", updateTime : "周三" }, { intentionLevel : "H", customerName : "郑钧", intentionCar : "奥迪Q5(进口)", updateTime : "9:15" }, { intentionLevel : "H", customerName : "Lucia Xie", intentionCar : "奥迪Q5(进口)", updateTime : "2016/12/20" }, { intentionLevel : "C", customerName : "司马相如", intentionCar : "奥迪Q5(进口)", updateTime : "2/20" }, { intentionLevel : "C", customerName : "张曲", intentionCar : "奥迪Q5(进口)", updateTime : "2017/2/15" }, { intentionLevel : "O", customerName : "赵平", intentionCar : "奥迪Q5(进口)", updateTime : "昨天" }, ]) }; } render() { return ( <View style={{flex: 1, paddingTop: 20}}> <View style={styles.customerList}> <ListView dataSource={this.state.dataSource} renderRow={(rowData) => <View style={styles.customerRow}> <Text style={styles.intentionLevel}>{rowData.intentionLevel}</Text> <Text style={styles.customerName}>{rowData.customerName}</Text> <Text style={styles.intentionCar}>{rowData.intentionCar}</Text> <Text style={styles.updateTime}>{rowData.updateTime}</Text> </View> } /> </View> </View> ); } } const styles = StyleSheet.create({ navigation:{ flex: 1, paddingTop:10, height:10, backgroundColor:’#458cd3′, }, customerList:{ flex: 1, paddingTop: 30, }, customerRow:{ flex: 1, flexDirection: ‘row’, height: 30, }, intentionLevel: { paddingLeft: 10, width: 20, color: ‘red’, }, customerName: { paddingLeft: 10, width: 100, color: ‘black’, }, intentionCar: { paddingLeft: 10, width: 120, color: ‘gray’, }, updateTime:{ paddingLeft: 10, paddingRight: 10, width: 120, color: ‘#c1c4c9’, }, }); AppRegistry.registerComponent(‘AwesomeProject’, () => AwesomeProject); |
实现效果:

现在想要时间的文字,在Text内,右对齐
所以尝试去添加为:
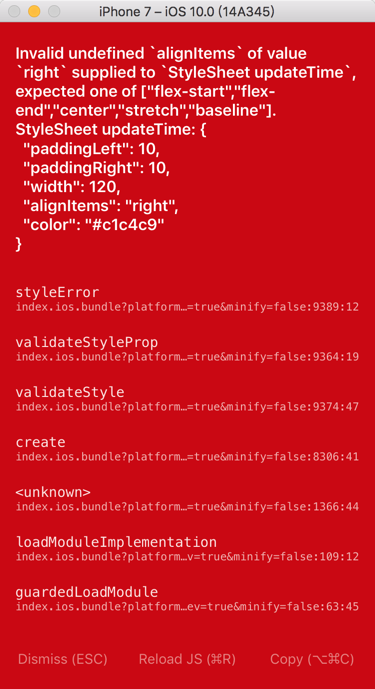
updateTime:{ paddingLeft: 10, paddingRight: 10, width: 120, alignItems: ‘right’, color: ‘#c1c4c9’, }, |
结果报错了:

然后注意到了:
中的,alignItems只有:
enum(‘flex-start’, ‘flex-end’, ‘center’, ‘stretch’, ‘baseline’) # |
没有left
然后注意到:
javascript – React-Native Updating List View DataSource – Stack Overflow
“ selectionText:{
fontSize:15,
paddingTop:3,
color:’#b5b5b5′,
textAlign:’right’
},”
所以去试试:
textAlign:’right’
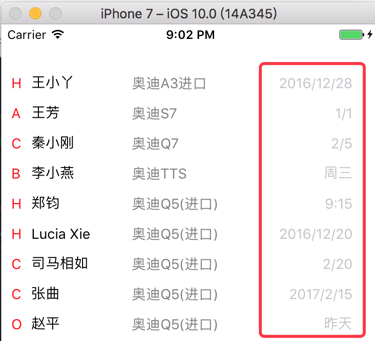
果然可以了文字右对齐了:

【总结】
ReactNative中,Text的右对齐,可以直接去设置 textAlign:’right’,即可。
举例:
updateTime:{ paddingLeft: 10, paddingRight: 10, width: 120, textAlign:’right’, color: ‘#c1c4c9’, }, |
转载请注明:在路上 » 【已解决】ReactNative中如何在Text中让文字右对齐