折腾:
期间,虽然可以跑起来solr的server和client了,但是搜不到要的结果
-》感觉本地导入数据有问题,所以后续solr搜索返回不到我们要的结果:
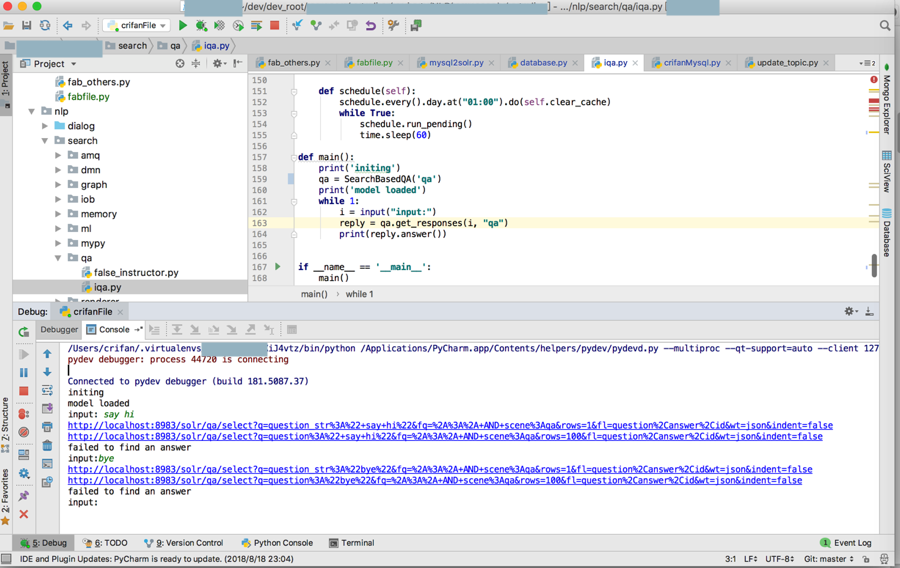
input: say hi
failed to find an answer
input:bye
所以再去想办法,重写导入数据才行:
所以重复之前的步骤:
删除之前的qa
➜ solr git:(master) ✗ solr delete -help
Usage: solr delete [-c name] [-deleteConfig true|false] [-p port] [-V]
Deletes a core or collection depending on whether Solr is running in standalone (core) or SolrCloud
mode (collection). If you’re deleting a collection in SolrCloud mode, the default behavior is to also
delete the configuration directory from Zookeeper so long as it is not being used by another collection.
You can override this behavior by passing -deleteConfig false when running this command.
-c <name> Name of the core / collection to delete
-deleteConfig <boolean> Delete the configuration directory from Zookeeper; default is true
-p <port> Port of a local Solr instance where you want to delete the core/collection
If not specified, the script will search the local system for a running
Solr instance and will use the port of the first server it finds.
-V Enables more verbose output.
➜ solr git:(master) ✗ solr delete -c qa
Deleting core ‘qa’ using command:
➜ solr git:(master) ✗ tree qa
qa [error opening dir]
0 directories, 0 files
➜ solr git:(master) ✗ ll
total 24
-rw-r–r– 1 crifan admin 2.9K 1 10 2018 README.txt
drwxr-xr-x 4 crifan admin 128B 1 10 2018 configsets
drwx——@ 5 crifan admin 160B 8 16 17:15 qa_toDelete
-rw-r–r– 1 crifan admin 2.1K 1 10 2018 solr.xml
-rw-r–r– 1 crifan admin 975B 1 10 2018 zoo.cfg
再去重新创建
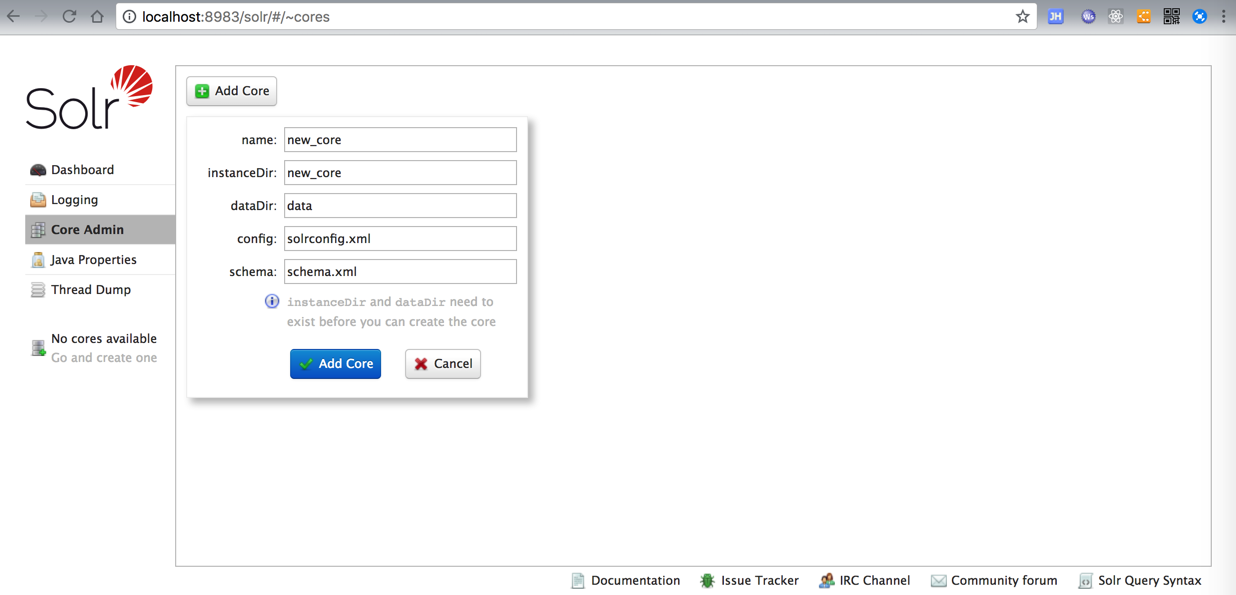
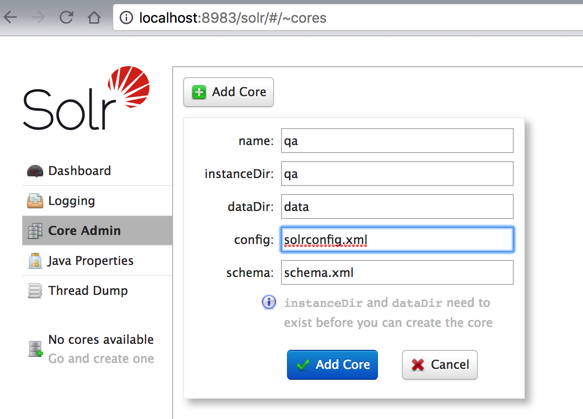
这次换用web页面中去创建(core,而不是collection)
-》http://localhost:8983/solr/#/~cores
Error CREATEing SolrCore ‘qa’: Unable to create core [qa] Caused by: Can’t find resource ‘solrconfig.xml’ in classpath or ‘/usr/local/Cellar/solr/7.2.1/server/solr/qa’
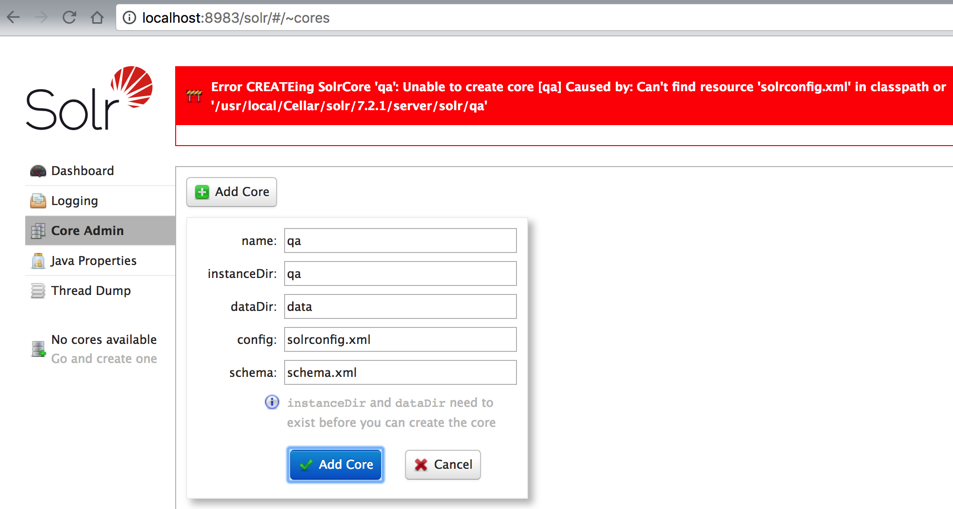
算了,还是先删除,再去命令行中创建吧
➜ solr git:(master) ✗ pwd
/usr/local/Cellar/solr/7.2.1/server/solr
➜ solr git:(master) ✗ solr delete -c qa
Deleting core ‘qa’ using command:
➜ solr git:(master) ✗ solr create -c qa -s 2 -rf 2
WARNING: Using _default configset. Data driven schema functionality is enabled by default, which is
NOT RECOMMENDED for production use.
To turn it off:
curl http://localhost:8983/solr/qa/config -d ‘{"set-user-property": {"update.autoCreateFields":"false"}}’
Created new core ‘qa’
然后重新运行脚本去导入数据:
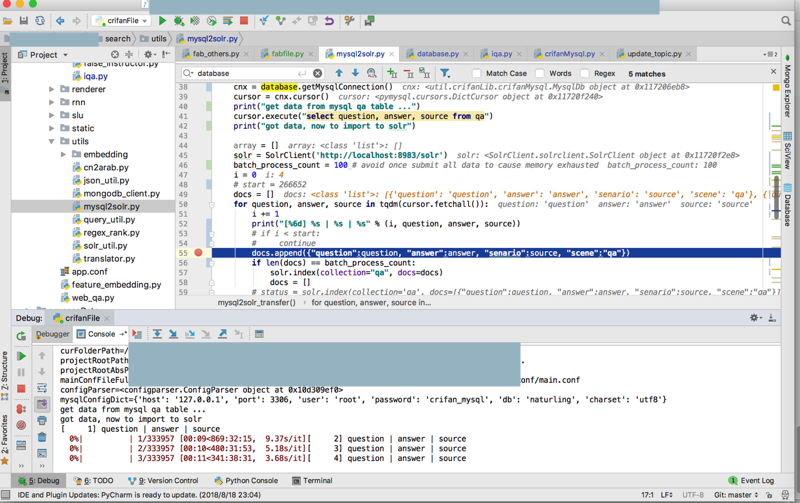
而之前在导入期间,发现有个奇怪的现象:
/Users/crifan/dev/dev_root/xxx/search/utils/mysql2solr.py
for question, answer, source in tqdm(cursor.fetchall()):
i += 1
print("[%6d] %s | %s | %s" % (i, question, answer, source))
结果打印出来的
question, answer, source
不是变量的值,只是字符串:
question, answer, source
所以很是奇怪
查了下,知道
tqdm/tqdm: A fast, extensible progress bar for Python and CLI
tqdm是个进度条的东西,和本地这里的数据,关系不大
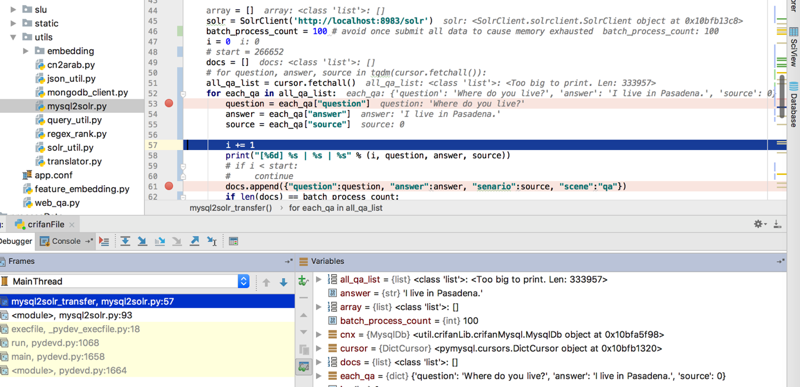
所以再去调试,代码换成:
# for question, answer, source in tqdm(cursor.fetchall()):
all_qa_list = cursor.fetchall()
for each_qa in all_qa_list:
question = each_qa["question"]
answer = each_qa["answer"]
source = each_qa["source"]
i += 1
print("[%6d] %s | %s | %s" % (i, question, answer, source))
结果发现each_qa是个dict:

所以此处代码写对了:
-》
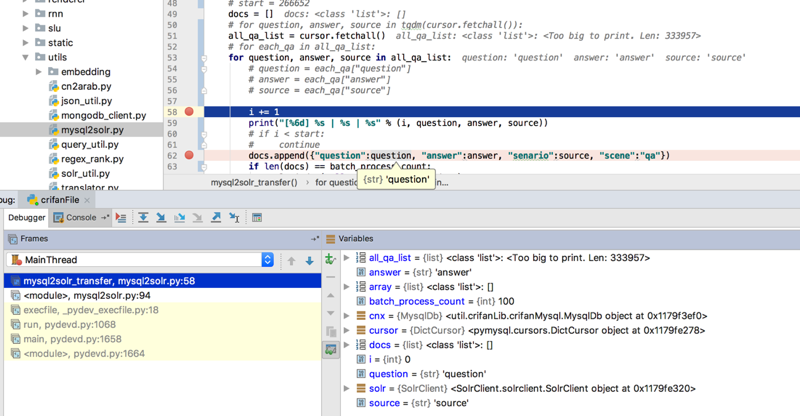
那再去换成:
all_qa_list = cursor.fetchall()
# for each_qa in all_qa_list:
for question, answer, source in all_qa_list:
# question = each_qa["question"]
# answer = each_qa["answer"]
# source = each_qa["source"]
i += 1
print("[%6d] %s | %s | %s" % (i, question, answer, source))
看看结果如何:
果然,只是3个字符串,而不是变量了:
突然想起来:
估计是此处:
torbdb和此处pymysql之间的区别?
cursor.execute("select question, answer, source from qa")
torbdb:会直接返回一个tuple,所以用question, answer, source,得到对应的值?
而此处pymysql只返回一个dict,所以只能再去用:
question = each_qa["question"]
answer = each_qa["answer"]
source = each_qa["source"]
得到对应的值。
所以改为:
# for question, answer, source in tqdm(cursor.fetchall()):
all_qa_list = cursor.fetchall()
for each_qa_dict in all_qa_list:
# for question, answer, source in all_qa_list:
question = each_qa_dict["question"]
answer = each_qa_dict["answer"]
source = each_qa_dict["source"]
i += 1
print("[%6d] %s | %s | %s" % (i, question, answer, source))
含义更清楚。
为了真正搞清楚,所以还是去:
torndb
bdarnell/torndb: A lightweight wrapper around MySQLdb. Originally part of the Tornado framework.
Torndb Documentation — Torndb 0.3 documentation
db = torndb.Connection("localhost", "mydatabase")
for article in db.query("SELECT * FROM articles"):
print article.title
所以torndb的select *返回的也是对象,通过属性才能获取属性的值
所以再去找找其他的
select field1, field2 from some_table
的例子,看看返回的是不是直接就是:
用for循环直接获取到对应的field的值了
只有select *
“总结下,torndb对MySQLdb封装后,query,get返回是list,dict这些,非常方便,可以直接拿来用,这是TA的优点,而且是默认自动commit的,不用MySQLdb的手动commit,用起来很是简洁。”
torndb select return
Examples of that how to use Torndb.
Python中MySQLdb和torndb模块对MySQL的断连问题处理 – Python开发社区 | CTOLib码库
MySQL-python: SELECT returns ‘long’ instead of the query – Stack Overflow
torndb解决MySQLdb不支持python3问题 – 简书
how to return mysql query result using python – Stack Overflow
python MySQLdb: SELECT DISTINCT – why returning long – Stack Overflow
算了,不继续深究了。
不过后来想起来了:不是用的torndb,而是:
import mysql.connector
所以目前基本上确定是:
python中的mysql:
import mysql.connector
cursor.execute("select question, answer, source from qa")
for question, answer, source in cursor.fetchall()
是可以获取想要的数据的
而pymysql的话需要:
import pymysql
…
cursor.execute("select question, answer, source from qa")
for each_qa_dict in cursor.fetchall()
question = each_qa_dict["question"]
answer = each_qa_dict["answer"]
source = each_qa_dict["source"]
才可以获取要的值。
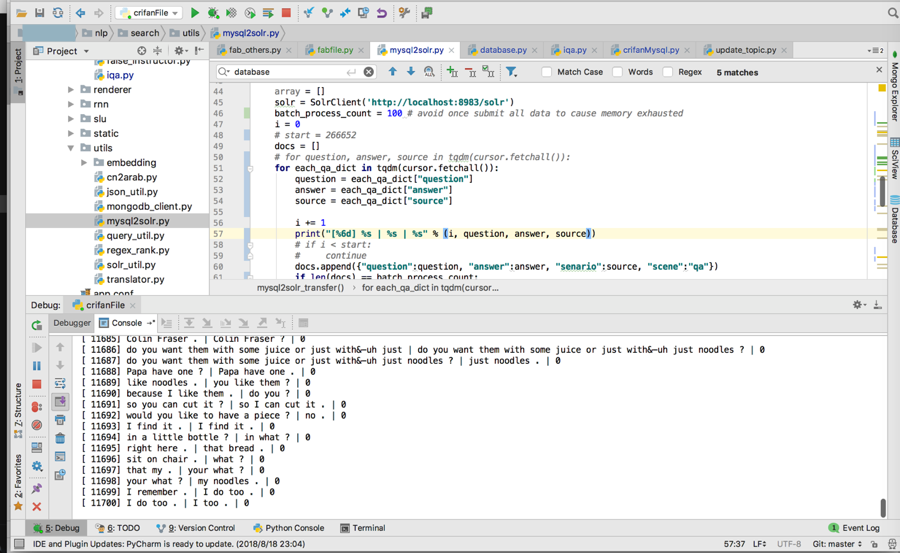
然后就可以正常获取要的值了:
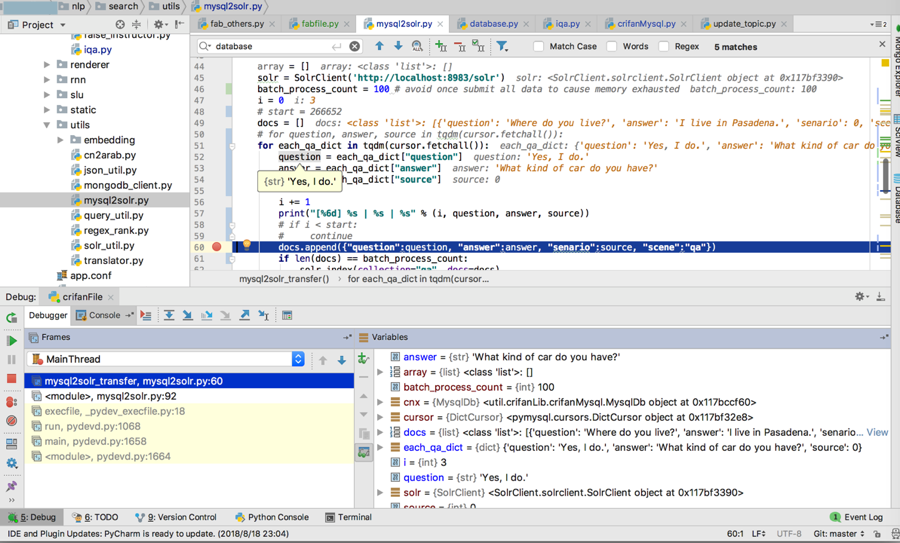
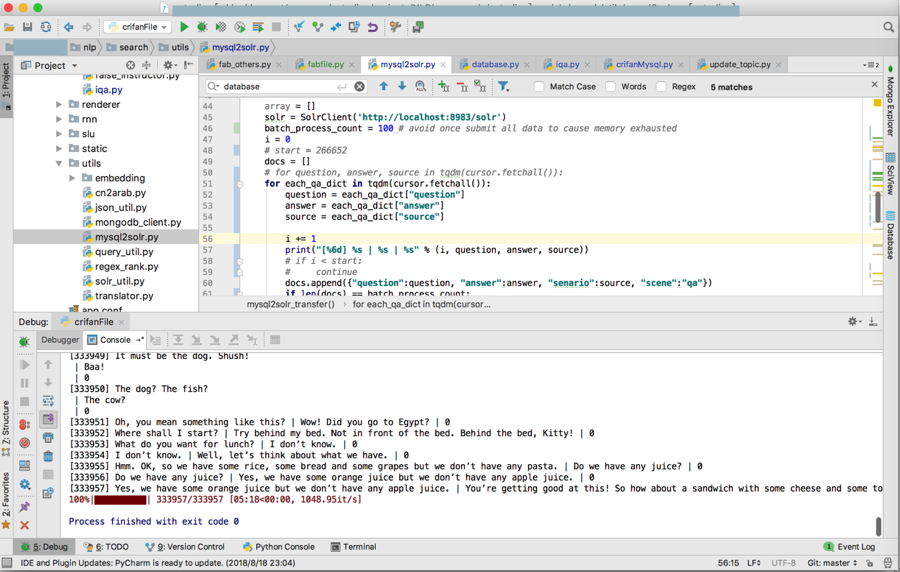
33万条,一会就导入好了:
导入后,data目录中就多了很多index:
➜ solr git:(master) ✗ pwd
/usr/local/Cellar/solr/7.2.1/server/solr
➜ solr git:(master) ✗ ll
total 24
-rw-r–r– 1 crifan admin 2.9K 1 10 2018 README.txt
drwxr-xr-x 4 crifan admin 128B 1 10 2018 configsets
drwxr-xr-x 5 crifan admin 160B 8 21 14:13 qa
drwx——@ 5 crifan admin 160B 8 16 17:15 qa_toDelete
-rw-r–r– 1 crifan admin 2.1K 1 10 2018 solr.xml
-rw-r–r– 1 crifan admin 975B 1 10 2018 zoo.cfg
➜ solr git:(master) ✗ tree qa
qa
├── conf
│ ├── lang
│ │ ├── contractions_ca.txt
│ │ ├── contractions_fr.txt
│ │ ├── contractions_ga.txt
│ │ ├── contractions_it.txt
│ │ ├── hyphenations_ga.txt
│ │ ├── stemdict_nl.txt
│ │ ├── stoptags_ja.txt
。。。
│ │ ├── stopwords_tr.txt
│ │ └── userdict_ja.txt
│ ├── managed-schema
│ ├── params.json
│ ├── protwords.txt
│ ├── solrconfig.xml
│ ├── stopwords.txt
│ └── synonyms.txt
├── core.properties
└── data
├── index
│ ├── _10.dii
│ ├── _10.dim
│ ├── _10.fdt
。。。
│ ├── _z.nvm
│ ├── _z.si
│ ├── _z_Lucene50_0.doc
│ ├── _z_Lucene50_0.pos
│ ├── _z_Lucene50_0.tim
│ ├── _z_Lucene50_0.tip
│ ├── _z_Lucene70_0.dvd
│ ├── _z_Lucene70_0.dvm
│ ├── segments_j
│ └── write.lock
├── snapshot_metadata
└── tlog
└── tlog.0000000000000000017
6 directories, 160 files
➜ solr git:(master) ✗ du -sh qa
63M qa
➜ solr git:(master) ✗ du -sh qa/*
296K qa/conf
4.0K qa/core.properties
63M qa/data
总大小也从40多M变成60多M了。
【总计】
此处,重新之前的步骤:
(1)删除之前的collection:
solr delete -c qa
(2)重新创建qa的collection:
solr create -c qa -s 2 -rf 2
(3)启动solr服务
solr stop -all
solr start
(4)核心是,利用脚本导入mysql中qa数据到solr期间,要确保数据正常:
之前不正常,现在代码改为:
import pymysql
…
# for question, answer, source in tqdm(cursor.fetchall()):
for each_qa_dict in tqdm(cursor.fetchall()):
question = each_qa_dict["question"]
answer = each_qa_dict["answer"]
source = each_qa_dict["source"]
i += 1
print("[%6d] %s | %s | %s" % (i, question, answer, source))
question, answer, source就是我们希望的实际的值,而不是之前出错时,
字符串:question, answer, source
了,然后即可正常后续的操作了。
转载请注明:在路上 » 【记录】删除重建Solr的core并重新导入数据建立索引