之前已经折腾过了:
[已解决]swift中给app名称和项目名称添加多国语言本地语言支持
现在需要:
把程序内的,所有中文,或英文,包括服务器端返回的英文或中文字符串,都统一处理
做成动态支持本机当前语言
swift ios 本地化支持
Localize-Swift首页、文档和下载 – Swift 国际化和本地化框架 – 开源中国社区
iOS 项目的本地化处理-Swift & Objective-C IOS-苦咖啡 –
使用Xcode6将你的项目本地化 | yulingtianxia’s blog
NSLocalizedString
iOS本地化 NSLocalizedString的使用 – 简书
iPhone中使用NSLocalizedString实现国际化 – 無名小卒 – 51CTO技术博客
nslocalizedstring swift
ios – What’s NSLocalizedString equivalent in Swift? – Stack Overflow
ios – NSLocalizedString with swift variable – Stack Overflow
然后代码改为:
即可生效:
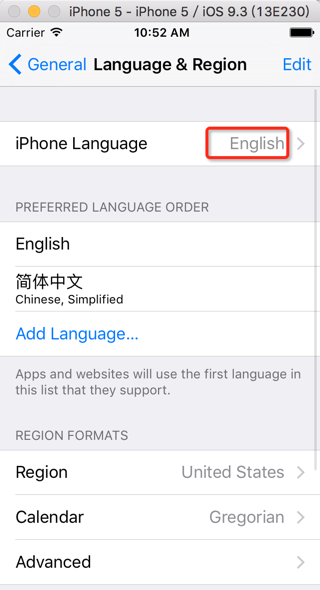
-》
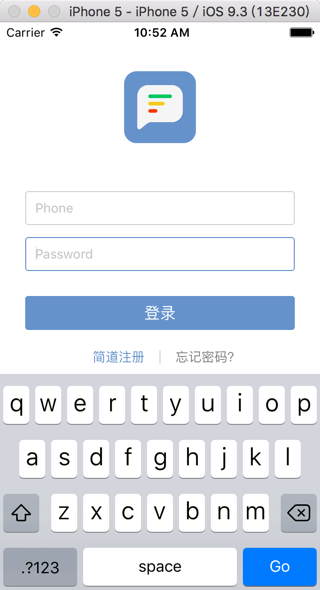
但是中文时,也还是显示中文
nslocalizedstring swift not work
ios8 – Swift NSLocalizedString practical use – Stack Overflow
最后搞懂了:
相关代码:
extension String { var localized: String { //NSBundle.mainBundle()=NSBundle </Users/crifan/Library/Developer/CoreSimulator/Devices/63F89987-3382-42A5-BC13-AE102BEF98DB/data/Containers/Bundle/Application/41774451-6A9D-4562-8D0E-13302C32EF31/JianDao.app> (loaded) //return NSLocalizedString(self, tableName: nil, bundle: NSBundle.mainBundle(), value: "", comment: "") return NSLocalizedString(self, tableName: "InfoPlist", bundle: NSBundle.mainBundle(), value: "", comment: self) } } |
其中InfoPlist对应着:InfoPlist.strings

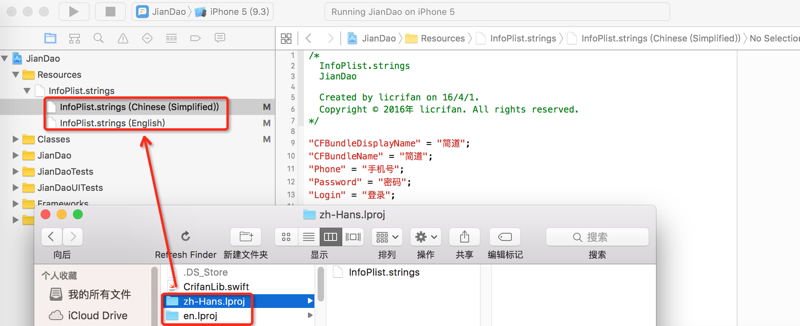

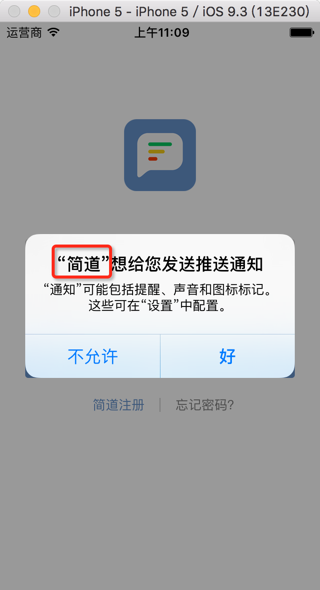
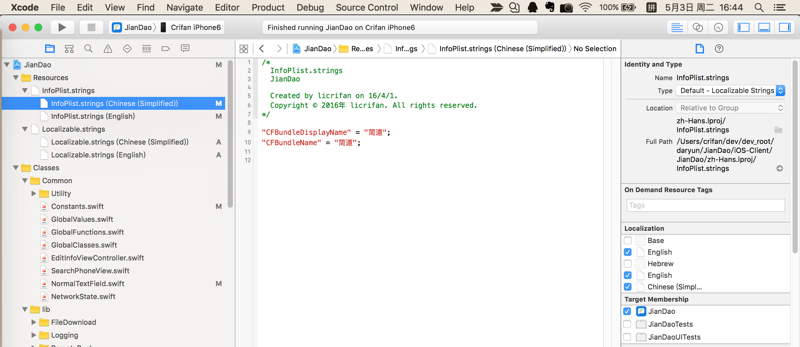
/* InfoPlist.strings JianDao Created by licrifan on 16/4/1. Copyright © 2016年 licrifan. All rights reserved. */ "CFBundleDisplayName" = "简道"; "CFBundleName" = "简道"; "Phone" = "手机号"; "Password" = "密码"; "Login" = "登录"; |
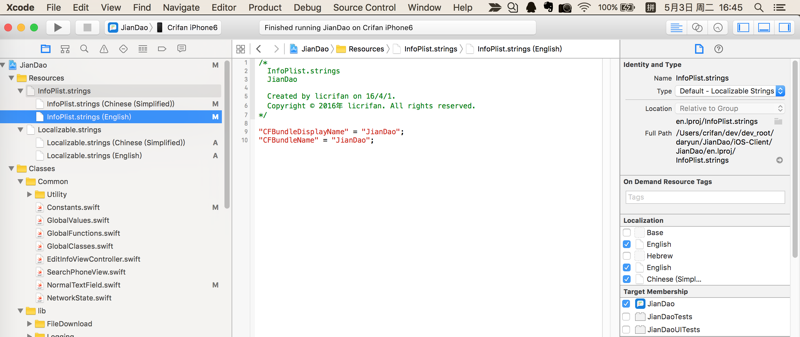
"CFBundleDisplayName" = "JianDao"; "CFBundleName" = "JianDao"; "Phone" = "Phone"; "Password" = "Password"; "Login" = "Login"; |
swift代码:
self.userTextField = NormalTextField(placeHolderStr: "Phone".localized) self.passwordTextField = NormalTextField(placeHolderStr: "Password".localized) loginButton.setTitle("Login".localized, forState: UIControlState.Normal) |
改为英文:
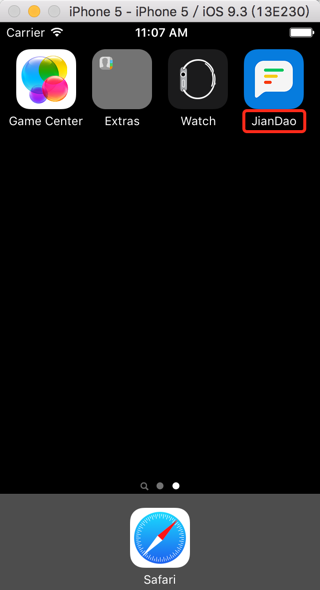
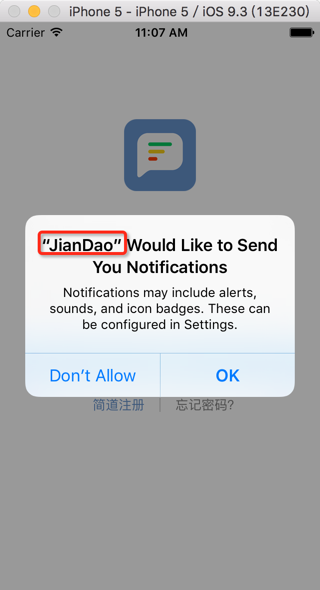
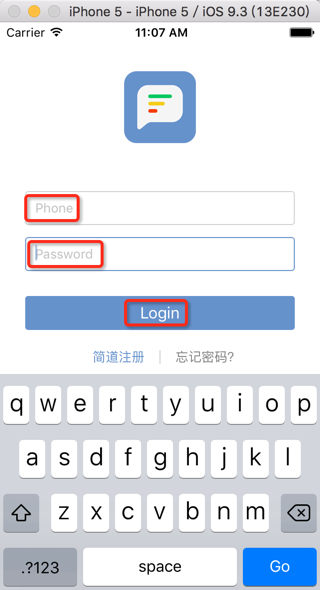
改为 简体中文:
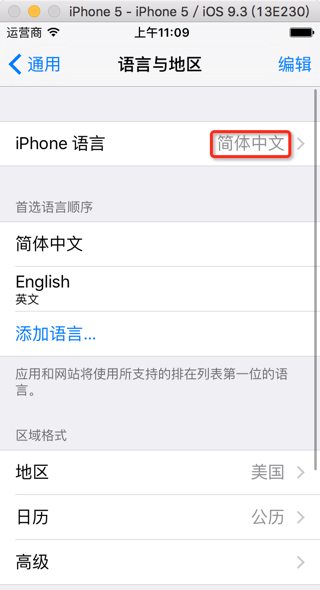
效果:
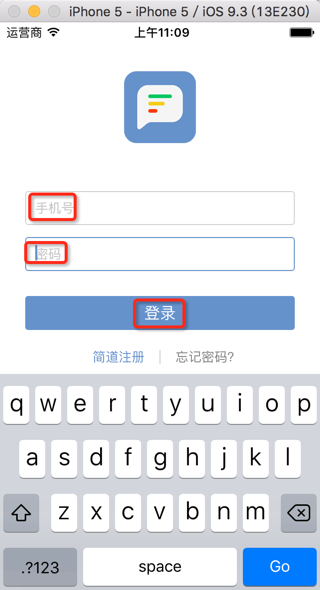
然后带参数的话,也可以参考sprintf:
ios – NSLocalizedString with swift variable – Stack Overflow
后来,改为,默认的那个Localizable.strings
-》这样调用NSLocalizedString就可以不用传入对应的table的名字了。
-》同时省掉默认的bundle
-》变成:
extension String { var localized: String { //NSBundle.mainBundle()=NSBundle </Users/crifan/Library/Developer/CoreSimulator/Devices/63F89987-3382-42A5-BC13-AE102BEF98DB/data/Containers/Bundle/Application/41774451-6A9D-4562-8D0E-13302C32EF31/JianDao.app> (loaded) //return NSLocalizedString(self, tableName: nil, bundle: NSBundle.mainBundle(), value: "", comment: "") // return NSLocalizedString(self, tableName: "InfoPlist", bundle: NSBundle.mainBundle(), value: "", comment: self) //defaul table is Localizable -> Localizable.strings return NSLocalizedString(self, comment: self) } } |
调用的地方,还是之前的写法,不变:
registerButton.setTitle("Register Jiandao".localized, forState: UIControlState.Normal) |
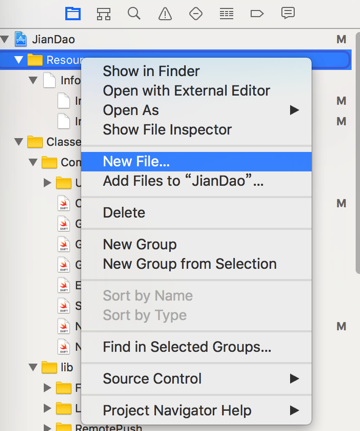
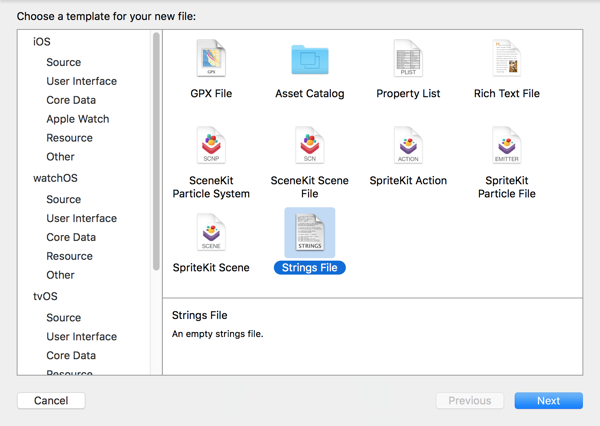
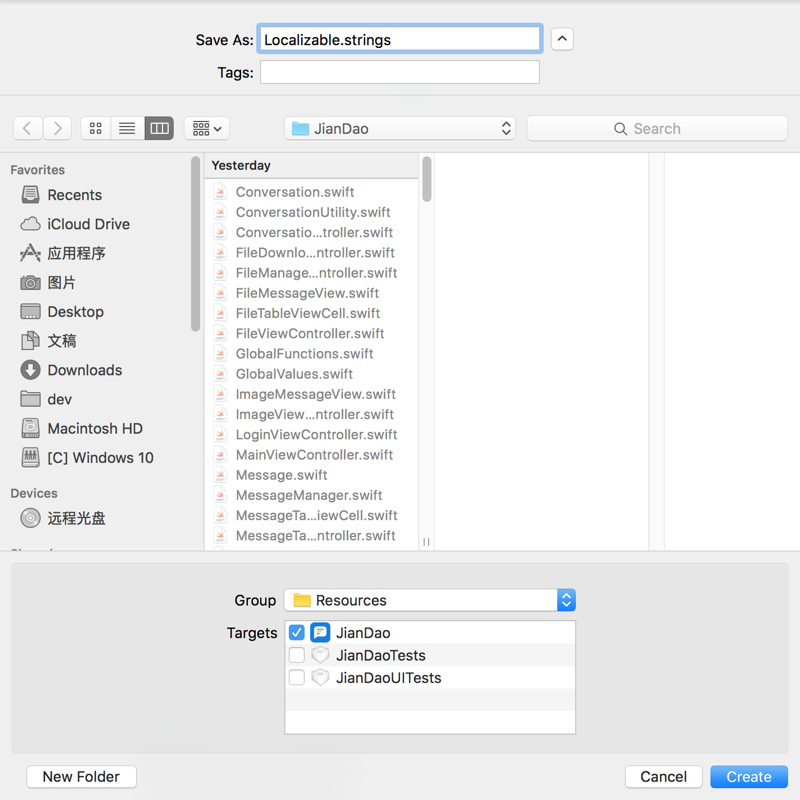
但是要去创建对应的新的字符串文件:
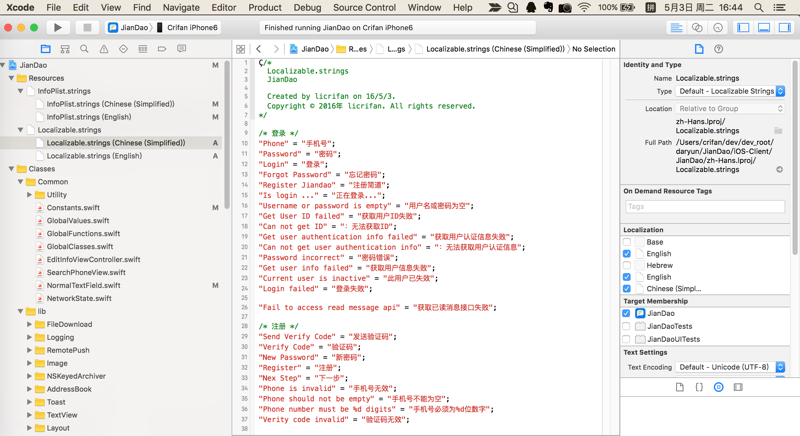
/* 登录 */ "Phone" = "手机号"; "Password" = "密码"; "Login" = "登录"; "Forgot Password" = "忘记密码"; "Register Jiandao" = "注册简道"; "Is login …" = "正在登录…"; "Username or password is empty" = "用户名或密码为空"; "Get User ID failed" = "获取用户ID失败"; "Can not get ID" = ":无法获取ID"; "Get user authentication info failed" = "获取用户认证信息失败"; "Can not get user authentication info" = ":无法获取用户认证信息"; "Password incorrect" = "密码错误"; "Get user info failed" = "获取用户信息失败"; "Current user is inactive" = "此用户已失效"; "Login failed" = "登录失败"; "Fail to access read message api" = "获取已读消息接口失败"; /* 注册 */ "Send Verify Code" = "发送验证码"; "Verify Code" = "验证码"; "New Password" = "新密码"; "Register" = "注册"; "Nex Step" = "下一步"; "Phone is invalid" = "手机号无效"; "Phone should not be empty" = "手机号不能为空"; "Phone number must be %d digits" = "手机号必须为%d位数字"; "Verity code invalid" = "验证码无效"; |
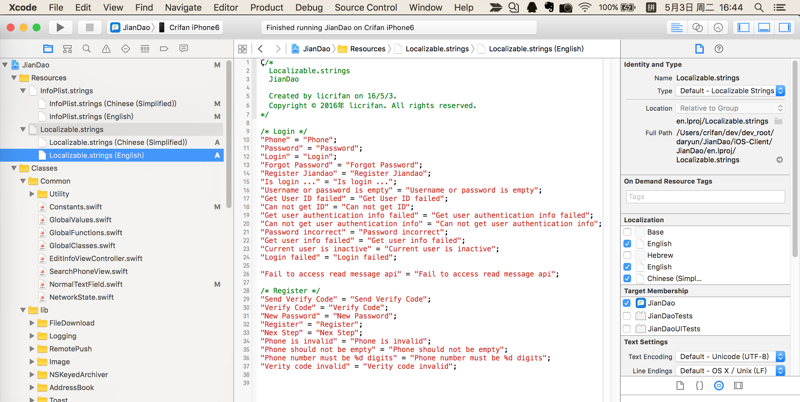
/* Login */ "Phone" = "Phone"; "Password" = "Password"; "Login" = "Login"; "Forgot Password" = "Forgot Password"; "Register Jiandao" = "Register Jiandao"; "Is login …" = "Is login …"; "Username or password is empty" = "Username or password is empty"; "Get User ID failed" = "Get User ID failed"; "Can not get ID" = "Can not get ID"; "Get user authentication info failed" = "Get user authentication info failed"; "Can not get user authentication info" = "Can not get user authentication info"; "Password incorrect" = "Password incorrect"; "Get user info failed" = "Get user info failed"; "Current user is inactive" = "Current user is inactive"; "Login failed" = "Login failed"; "Fail to access read message api" = "Fail to access read message api"; /* Register */ "Send Verify Code" = "Send Verify Code"; "Verify Code" = "Verify Code"; "New Password" = "New Password"; "Register" = "Register"; "Nex Step" = "Nex Step"; "Phone is invalid" = "Phone is invalid"; "Phone should not be empty" = "Phone should not be empty"; "Phone number must be %d digits" = "Phone number must be %d digits"; "Verity code invalid" = "Verity code invalid"; |
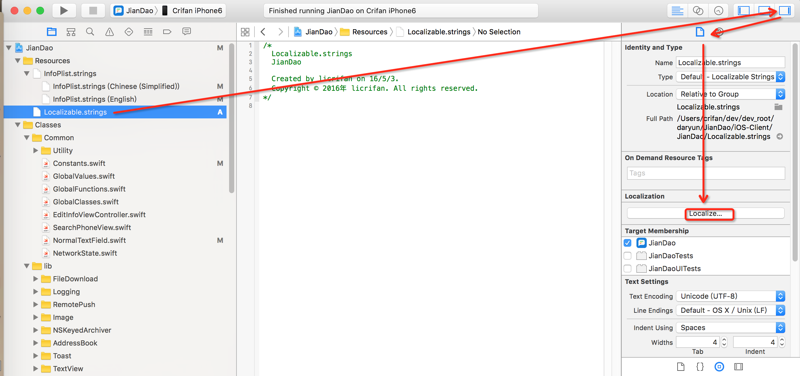
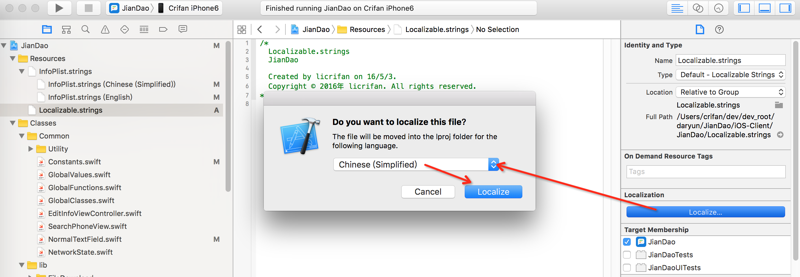
再去点击English:
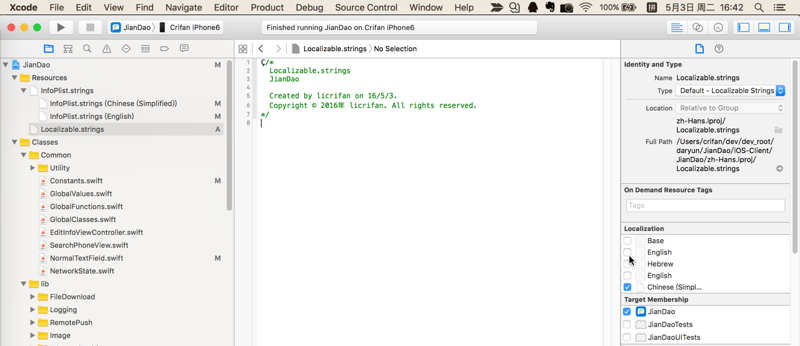
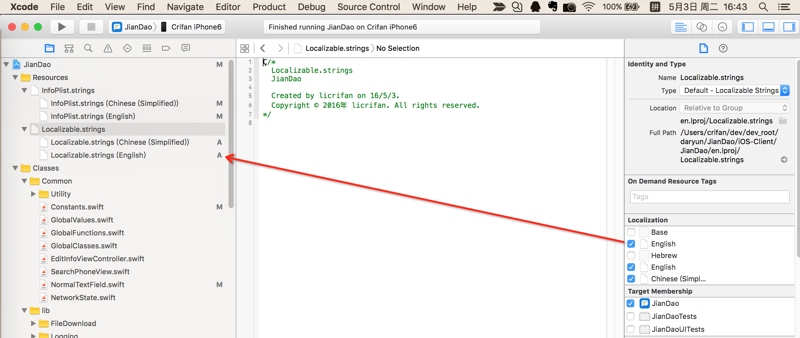
然后点击对应的文件,输入对应的内容:
对应的,InfoPlist.strings
只是针对于info.plist中的key,去做国际化多国语言的支持的
[总结]
之前折腾的InfoPlist.strings,只是针对于info.plist中的key,去做国际化多国语言的支持的
而对于程序内部的字符串的本地话支持,可以创建,iOS默认的table名:Localizable
-》File-》Resource-》Strings File-》Localizable.strings
-》然后给Localizable.strings添加多国语言支持
-》右边属性中,点击Localize-》添加此处需要多:
Simplified Chinese
和
English
比如:
对应的:
Localizable.strings(Chinese (Simplified))
"Register Jiandao" = "注册简道"; |
Localizable.strings(English)
"Register Jiandao" = "Register Jiandao"; |
-》然后添加对应的key和对应语言的文字
-》这样代码中调用NSLocalizedString就可以不用传入对应的table的名字了。
-》同时省掉默认的bundle
-》变成:
NSLocalizedString(self, comment: self) |
而无需之前的:
NSLocalizedString(self, tableName: "InfoPlist", bundle: NSBundle.mainBundle(), value: "", comment: self) |
-》此处多给String添加了个扩展:
extension String { var localized: String { //defaul table is Localizable -> Localizable.strings return NSLocalizedString(self, comment: self) } } |
用起来更方便:
registerButton.setTitle("Register Jiandao".localized, forState: UIControlState.Normal) |
转载请注明:在路上 » [已解决]iOS的swift中给app添加本地化多国语言支持