折腾:
【已解决】Mac本地搭建mysql数据库并导入已备份出的sql文件
期间,先要去Mac本地中,去安装和阿里云RDS上版本一样的5.7的mysql数据库。
mac install mysql 5.7
在MAC OSX 10.11 上安装 MySQL 5.7 – 简书
MySQL :: Download MySQL Community Server
-》
MySQL :: Download MySQL Community Server
现有macOS版本是:
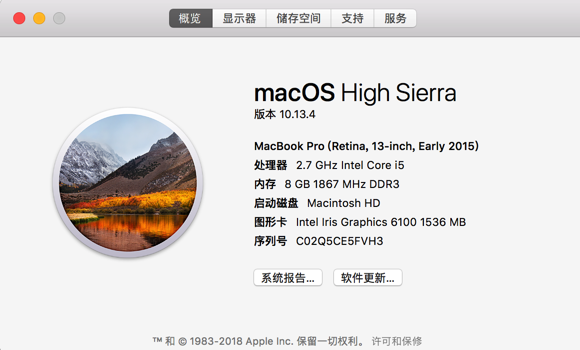
macOS High Sierra 10.13.4
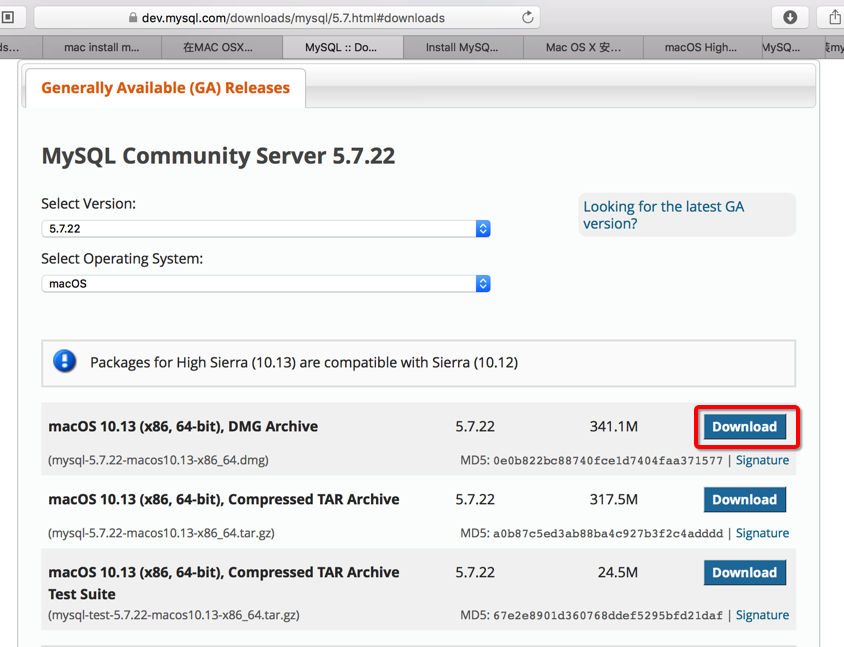
-》
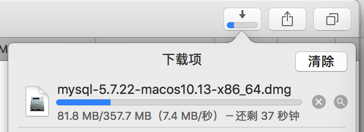
https://cdn.mysql.com//Downloads/MySQL-5.7/mysql-5.7.22-macos10.13-x86_64.dmg
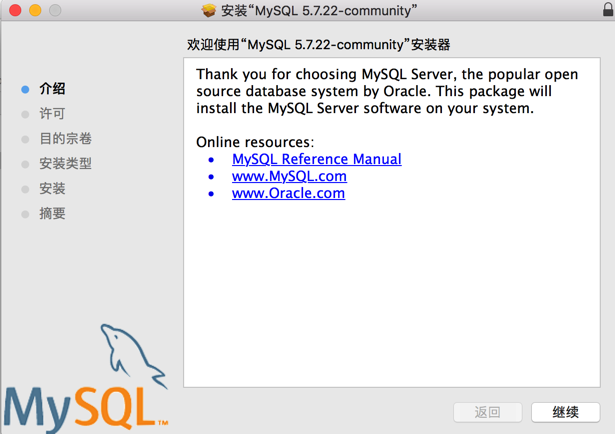
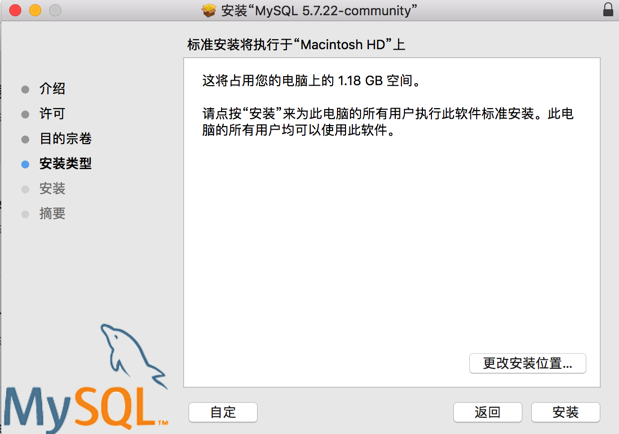
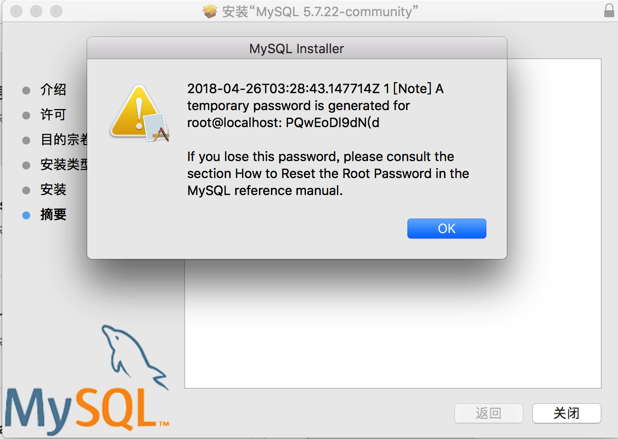
“2018-04-26T03:28:43.147714Z 1 [Note] A temporary password is generated for root@localhost: PQwEoDl9dN(d
If you lose this password, please consult the section How to Reset the Root Password in the MySQL reference manual.”
Install MySQL 5.7 on macOS Sierra | Mac Mini Vault
Install MySQL 5.7 on macOS High Sierra | Mac Mini Vault
安装后,新开终端果然找不到:
<code>Last login: Thu Apr 26 09:12:23 on ttys008
➜  ~ which mysql
mysql not found
</code>
所以去加到环境变量中
<code>➜ ~ ll /usr/local/mysql/bin/mysql* -rwxr-xr-x 1 root wheel 4.9M 3 4 23:25 /usr/local/mysql/bin/mysql -rwxr-xr-x 1 root wheel 26M 3 4 23:25 /usr/local/mysql/bin/mysql_client_test_embedded -rwxr-xr-x 1 root wheel 4.7K 3 4 22:27 /usr/local/mysql/bin/mysql_config -rwxr-xr-x 1 root wheel 4.3M 3 4 23:25 /usr/local/mysql/bin/mysql_config_editor -rwxr-xr-x 1 root wheel 26M 3 4 23:25 /usr/local/mysql/bin/mysql_embedded -rwxr-xr-x 1 root wheel 5.8M 3 4 23:25 /usr/local/mysql/bin/mysql_install_db -rwxr-xr-x 1 root wheel 3.6M 3 4 23:25 /usr/local/mysql/bin/mysql_plugin -rwxr-xr-x 1 root wheel 4.5M 3 4 23:25 /usr/local/mysql/bin/mysql_secure_installation -rwxr-xr-x 1 root wheel 3.7M 3 4 23:25 /usr/local/mysql/bin/mysql_ssl_rsa_setup -rwxr-xr-x 1 root wheel 3.6M 3 4 23:25 /usr/local/mysql/bin/mysql_tzinfo_to_sql -rwxr-xr-x 1 root wheel 5.3M 3 4 23:25 /usr/local/mysql/bin/mysql_upgrade -rwxr-xr-x 1 root wheel 4.5M 3 4 23:25 /usr/local/mysql/bin/mysqladmin -rwxr-xr-x 1 root wheel 5.0M 3 4 23:25 /usr/local/mysql/bin/mysqlbinlog -rwxr-xr-x 1 root wheel 4.6M 3 4 23:25 /usr/local/mysql/bin/mysqlcheck -rwxr-xr-x 1 root wheel 28M 3 4 23:25 /usr/local/mysql/bin/mysqld -rwxr-xr-x 1 root wheel 60M 3 4 23:25 /usr/local/mysql/bin/mysqld-debug -rwxr-xr-x 1 root wheel 26K 3 4 22:27 /usr/local/mysql/bin/mysqld_multi -rwxr-xr-x 1 root wheel 28K 3 4 22:27 /usr/local/mysql/bin/mysqld_safe -rwxr-xr-x 1 root wheel 4.6M 3 4 23:25 /usr/local/mysql/bin/mysqldump -rwxr-xr-x 1 root wheel 7.3K 3 4 22:27 /usr/local/mysql/bin/mysqldumpslow -rwxr-xr-x 1 root wheel 4.5M 3 4 23:25 /usr/local/mysql/bin/mysqlimport -rwxr-xr-x 1 root wheel 5.5M 3 4 23:25 /usr/local/mysql/bin/mysqlpump -rwxr-xr-x 1 root wheel 4.5M 3 4 23:25 /usr/local/mysql/bin/mysqlshow -rwxr-xr-x 1 root wheel 4.6M 3 4 23:25 /usr/local/mysql/bin/mysqlslap -rwxr-xr-x 1 root wheel 26M 3 4 23:25 /usr/local/mysql/bin/mysqltest_embedded -rwxr-xr-x 1 root wheel 7.2M 3 4 23:25 /usr/local/mysql/bin/mysqlxtest ➜ ~ vi ~/.bashrc ➜ ~ cat ~/.bashrc export NVM_DIR="/Users/crifan/.nvm" [ -s "$NVM_DIR/nvm.sh" ] && . "$NVM_DIR/nvm.sh" # This loads nvm #export PATH="/Users/crifan/Library/Python/2.7/bin:/Users/crifan/Library/Python/3.6/bin:$PATH" export PATH="/usr/local/mysql/bin:/Users/crifan/Library/Python/2.7/bin:/Users/crifan/Library/Python/3.6/bin:$PATH" ➜ ~ source ~/.bashrc ➜ ~ which mysql /usr/local/mysql/bin/mysql ➜ ~ which mysqldump /usr/local/mysql/bin/mysqldump ➜ ~ mysql --version mysql Ver 14.14 Distrib 5.7.22, for macos10.13 (x86_64) using EditLine wrapper </code>
加好了。
<code>➜  ~ sudo /usr/local/mysql/support-files/mysql.server stop
Password:
Sorry, try again.
Password:
ERROR! MySQL server PID file could not be found!
</code>
注意:此处密码是sudo的密码。不是那个临时密码。
但是貌似此处并没有开启mysql的server
所以估计才提示找不到pid
<code>➜  ~ mysqld_safe --skip-grant-tables
/usr/local/mysql/bin/mysqld_safe: line 647: /usr/local/mysql/data/promote.cache-dns.local.err: Permission denied
Logging to '/usr/local/mysql/data/promote.cache-dns.local.err'.
2018-04-26T03:39:13.6NZ mysqld_safe Starting mysqld daemon with databases from /usr/local/mysql/data
/usr/local/mysql/bin/mysqld_safe: line 144: /usr/local/mysql/data/promote.cache-dns.local.err: Permission denied
/usr/local/mysql/bin/mysqld_safe: line 198: /usr/local/mysql/data/promote.cache-dns.local.err: Permission denied
/usr/local/mysql/bin/mysqld_safe: line 906: /usr/local/mysql/data/promote.cache-dns.local.err: Permission denied
rm: /usr/local/mysql/data/promote.cache-dns.local.pid.shutdown: Permission denied
2018-04-26T03:39:13.6NZ mysqld_safe mysqld from pid file /usr/local/mysql/data/promote.cache-dns.local.pid ended
/usr/local/mysql/bin/mysqld_safe: line 144: /usr/local/mysql/data/promote.cache-dns.local.err: Permission denied
➜  ~ sudo mysqld_safe --skip-grant-tables
Logging to '/usr/local/mysql/data/promote.cache-dns.local.err'.
2018-04-26T03:39:20.6NZ mysqld_safe Starting mysqld daemon with databases from /usr/local/mysql/data

</code>

再去开另外一个终端:
<code>
Last login: Thu Apr 26 11:33:48 on ttys009
➜ ~ sudo mysql -u root
Password:
Welcome to the MySQL monitor. Commands end with ; or \g.
Your MySQL connection id is 2
Server version: 5.7.22 MySQL Community Server (GPL)
Copyright (c) 2000, 2018, Oracle and/or its affiliates. All rights reserved.
Oracle is a registered trademark of Oracle Corporation and/or its
affiliates. Other names may be trademarks of their respective
owners.
Type 'help;' or '\h' for help. Type '\c' to clear the current input statement.
mysql> use mysql
Reading table information for completion of table and column names
You can turn off this feature to get a quicker startup with -A
Database changed
mysql> update user set authentication_string=password(‘crifan_mysql') where user='root';
'> ^C
mysql> update user set authentication_string=password('crifan_mysql') where user='root';
Query OK, 1 row affected, 1 warning (0.01 sec)
Rows matched: 1 Changed: 1 Warnings: 1
</code>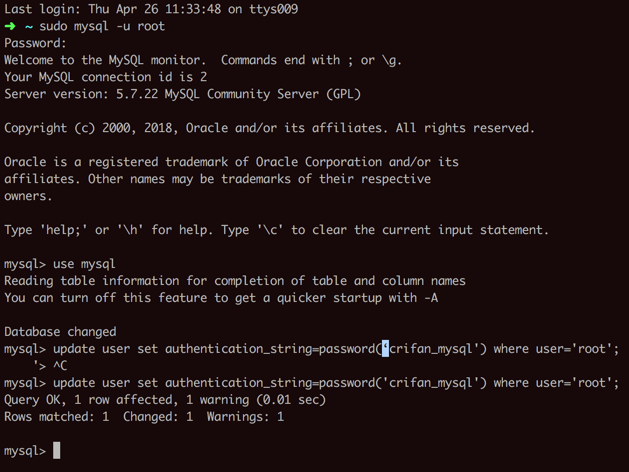
然后再去:
关掉之前的–skip-grant-tables的窗口:
用Control+Z去关掉:
<code>➜  ~ sudo mysqld_safe --skip-grant-tables
Logging to '/usr/local/mysql/data/promote.cache-dns.local.err'.
2018-04-26T03:39:20.6NZ mysqld_safe Starting mysqld daemon with databases from /usr/local/mysql/data
^C^C^C^C^C^Z
[1]  + 21662 suspended  sudo mysqld_safe --skip-grant-tables
</code>
去试试mysql的正常登录:
结果竟然不用密码直接登录了:
<code>➜ ~ mysql -u root Welcome to the MySQL monitor. Commands end with ; or \g. Your MySQL connection id is 3 Server version: 5.7.22 MySQL Community Server (GPL) Copyright (c) 2000, 2018, Oracle and/or its affiliates. All rights reserved. Oracle is a registered trademark of Oracle Corporation and/or its affiliates. Other names may be trademarks of their respective owners. Type 'help;' or '\h' for help. Type '\c' to clear the current input statement. mysql> [2] + 22192 suspended mysql -u root </code>
去看看进程:
<code>➜  ~ ps -ef | grep mysql_safe
  501 22210 20742   0 11:43上午 ttys009    0:00.00 grep --color=auto --exclude-dir=.bzr --exclude-dir=CVS --exclude-dir=.git --exclude-dir=.hg --exclude-dir=.svn mysql_safe
➜  ~
</code>
好像没有了那个mysql_safe了啊。
又开了终端,发现还是无需密码就可以登录mysql
去取消这个不带密码的限制
好像刚才少了:
flush privileges;
去加上:
<code>➜ ~ mysql -u root
Welcome to the MySQL monitor. Commands end with ; or \g.
Your MySQL connection id is 5
Server version: 5.7.22 MySQL Community Server (GPL)
Copyright (c) 2000, 2018, Oracle and/or its affiliates. All rights reserved.
Oracle is a registered trademark of Oracle Corporation and/or its
affiliates. Other names may be trademarks of their respective
owners.
Type 'help;' or '\h' for help. Type '\c' to clear the current input statement.
mysql> update user set authentication_string=password('crifan_mysql') where user='root';
ERROR 1046 (3D000): No database selected
mysql> use mysql
Reading table information for completion of table and column names
You can turn off this feature to get a quicker startup with -A
Database changed
mysql> update user set authentication_string=password('crifan_mysql') where user='root';
Query OK, 0 rows affected, 1 warning (0.00 sec)
Rows matched: 1 Changed: 0 Warnings: 1
mysql> flush privileges;
Query OK, 0 rows affected (0.01 sec)
</code>然后继续找找
然后flush后,就生效了:
就需要密码登录了:
<code> ~ mysql -u root ERROR 1045 (28000): Access denied for user 'root'@'localhost' (using password: NO) ➜ ~ mysql -u root -p Enter password: Welcome to the MySQL monitor. Commands end with ; or \g. Your MySQL connection id is 7 Server version: 5.7.22 Copyright (c) 2000, 2018, Oracle and/or its affiliates. All rights reserved. Oracle is a registered trademark of Oracle Corporation and/or its affiliates. Other names may be trademarks of their respective owners. Type 'help;' or '\h' for help. Type '\c' to clear the current input statement. mysql> [4] + 23167 suspended mysql -u root -p ➜ ~ mysql -u root ERROR 1045 (28000): Access denied for user 'root'@'localhost' (using password: NO) ➜ ~ mysql -u root -pcrifan_mysql mysql: [Warning] Using a password on the command line interface can be insecure. Welcome to the MySQL monitor. Commands end with ; or \g. Your MySQL connection id is 9 Server version: 5.7.22 Copyright (c) 2000, 2018, Oracle and/or its affiliates. All rights reserved. Oracle is a registered trademark of Oracle Corporation and/or its affiliates. Other names may be trademarks of their respective owners. Type 'help;' or '\h' for help. Type '\c' to clear the current input statement. mysql> </code>
然后就可以正常操作了。
然后找到之前的mysql的工具,比如navicat或Sequel Pro

去连接本地mysql看看
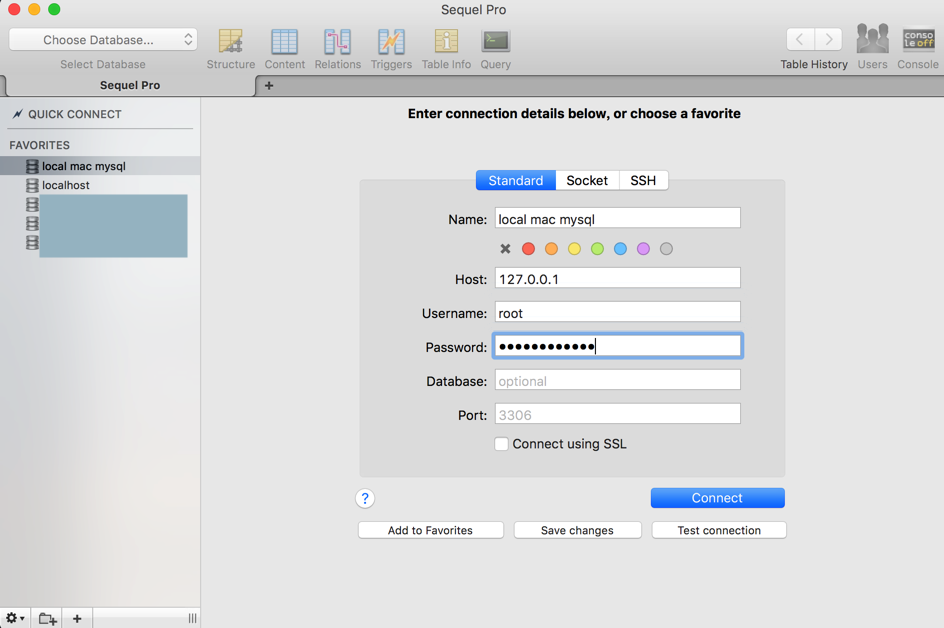
结果连接出错:
【已解决】Mac中Sequel连接本地Mysql出错:Unable to connect to host 127.0.0.1, or the request timed out
【总结】
此处在Mac本地中,安装并正常访问mysql的过程是:
1.先去mysql官网下载dmg安装文件,然后安装:
MySQL :: Download MySQL Community Server
-》
MySQL :: Download MySQL Community Server
找到此处需要的:
341.1M的(mysql-5.7.22-macos10.13-x86_64.dmg)
macOS 10.13 (x86, 64-bit), DMG Archive
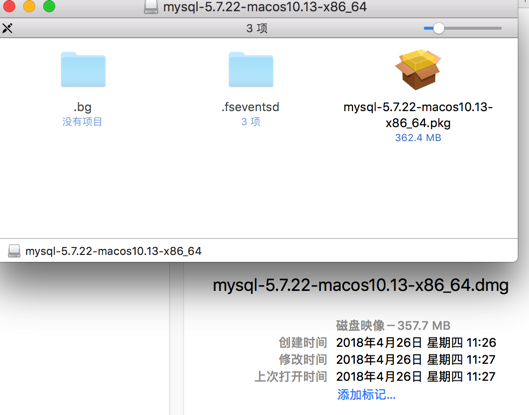
下载后,双击dmg即可安装。
注意期间会有生成一个临时密码。
2.把mysql加到PATH环境变量中
<code>vi ~/.bashrc
</code>
把:
<code>/usr/local/mysql/bin
</code>
加进去:
<code>export PATH="/usr/local/mysql/bin:/Users/crifan/Library/Python/2.7/bin:/Users/crifan/Library/Python/3.6/bin:$PATH"
</code>
然后source一下使得当前就生效:
<code>source ~/.bashrc
</code>
通过:
<code>➜  ~ which mysql
/usr/local/mysql/bin/mysql
</code>
确认已把mysql加到环境变量中了。
3.Mac中dmg安装的mysql默认不需要密码就可以登录的
所以此处最好去设置对应的密码
且如果用默认的临时密码,可能会导致其他工具无法正常连接
单独开个终端shell去:
<code>sudo mysqld_safe --skip-grant-tables
</code>
然后另外再开个终端去:
<code>use mysql;
update user set authentication_string=password('new_password') where user='root’;
flush privileges;
exit
</code>
注意:
<code>password('new_password
</code>中,是英文的单引号’,不是中文的单引号‘
-》我就是从别人网页中拷贝过来,结果发现是单引号,导致无法继续正常执行的。
然后就可以正常使用:
<code>mysql -u root
</code>
去用新密码登录进去了。
4.为了防止其他mysql工具连接出错,还需要设置密码不过期,且重新再去设置一下新密码
<code>mysql -u root -p
SET PASSWORD = PASSWORD('your_new_password’);
use mysql;
update user set password_expired='N' where user='root’;
flush privileges;
exit
</code>
即可。
5.后续记得用mysql之前,确保mysql(的server)是正常运行了的:
对于mysql的服务的管理是:
<code>sudo /usr/local/mysql/support-files/mysql.server status
sudo /usr/local/mysql/support-files/mysql.server start
sudo /usr/local/mysql/support-files/mysql.server stop
sudo /usr/local/mysql/support-files/mysql.server restart
</code>