折腾:
【记录】将本地合并后的MongoDB的main数据导入在线生产服务器中
期间,然后可以去本地导出数据库了:
不过参考之前的:
【已解决】mongoimport/mongoexport和mongodump/mongorestore的区别
感觉导入到在线服务器中,其实可以不用上传文件到服务器中后本地导入
直接可以用:mongoimport 加上-h和–port后去导入即可打算:
先用mongoexport:导出本地数据
再用mongoimport:导入(上面导出的本地的数据)到在线服务器中
mongodb mongoimport
mongoimport – How to bypass the character while import in MongoDB? – Stack Overflow
mongodb – Mongoimport of json file – Stack Overflow
➜ local_export git:(master) ✗ mongoexport -d storybook -o local_storybook.json
2018-10-26T17:23:17.413+0800 error validating settings: must specify a collection
2018-10-26T17:23:17.414+0800 try ‘mongoexport –help’ for more information
好像不能一次性导出db的所有collection?
mongoexport error validating settings: must specify a collection
json – mongodb-error validating settings: only one positional argument is allowed – Stack Overflow
mongoimport – MongoDB – validating settings error – Stack Overflow
Could not export whole database using MongoDB in Ubuntu – Stack Overflow
好像用mongodump是可以实现的 批量导出某个db的所有的collection的?
官网解释是:
“Avoid using mongoimport and mongoexport for full instance production backups. They do not reliably preserve all rich BSON data types, because JSON can only represent a subset of the types supported by BSON. Use mongodump and mongorestore as described in MongoDB Backup Methods for this kind of functionality.”
生产环境中,备份和恢复时,由于mongoimport/mongoexport导出的只是JSON,而MongoDB本身内部的数据是用BSON保存的,而BSON是JSON的超集,JSON是BSON的子集,JSON无法完全覆盖和表达BSON数据 -》为了防止可能的特殊的类型的数据的丢失,所以要:
生产环境的数据的备份和恢复,要避免用(只支持JSON的)mongoimport/mongoexport
-》所以此处还是去换用:mongodump/mongorestore
mongodump export whole database
How to export all collection in MongoDB? – Stack Overflow
How do I dump an entire MongoDB database as text/json? – Stack Overflow
➜ local_export git:(master) ✗ mongodump –help
Usage:
mongodump <options>
Export the content of a running server into .bson files.
Specify a database with -d and a collection with -c to only dump that database or collection.
See http://docs.mongodb.org/manual/reference/program/mongodump/ for more information.
general options:
–help print usage
–version print the tool version and exit
verbosity options:
-v, –verbose=<level> more detailed log output (include multiple times for more verbosity, e.g. -vvvvv, or specify a
numeric value, e.g. –verbose=N)
–quiet hide all log output
connection options:
-h, –host=<hostname> mongodb host to connect to (setname/host1,host2 for replica sets)
–port=<port> server port (can also use –host hostname:port)
ssl options:
–ssl connect to a mongod or mongos that has ssl enabled
–sslCAFile=<filename> the .pem file containing the root certificate chain from the certificate authority
–sslPEMKeyFile=<filename> the .pem file containing the certificate and key
–sslPEMKeyPassword=<password> the password to decrypt the sslPEMKeyFile, if necessary
–sslCRLFile=<filename> the .pem file containing the certificate revocation list
–sslAllowInvalidCertificates bypass the validation for server certificates
–sslAllowInvalidHostnames bypass the validation for server name
–sslFIPSMode use FIPS mode of the installed openssl library
authentication options:
-u, –username=<username> username for authentication
-p, –password=<password> password for authentication
–authenticationDatabase=<database-name> database that holds the user’s credentials
–authenticationMechanism=<mechanism> authentication mechanism to use
namespace options:
-d, –db=<database-name> database to use
-c, –collection=<collection-name> collection to use
uri options:
–uri=mongodb-uri mongodb uri connection string
query options:
-q, –query= query filter, as a JSON string, e.g., ‘{x:{$gt:1}}’
–queryFile= path to a file containing a query filter (JSON)
–readPreference=<string>|<json> specify either a preference name or a preference json object
–forceTableScan force a table scan
output options:
-o, –out=<directory-path> output directory, or ‘-‘ for stdout (defaults to ‘dump’)
–gzip compress archive our collection output with Gzip
–repair try to recover documents from damaged data files (not supported by all storage engines)
–oplog use oplog for taking a point-in-time snapshot
–archive=<file-path> dump as an archive to the specified path. If flag is specified without a value, archive is written to
stdout
–dumpDbUsersAndRoles dump user and role definitions for the specified database
–excludeCollection=<collection-name> collection to exclude from the dump (may be specified multiple times to exclude additional
collections)
–excludeCollectionsWithPrefix=<collection-prefix> exclude all collections from the dump that have the given prefix (may be specified multiple times to
exclude additional prefixes)
-j, –numParallelCollections= number of collections to dump in parallel (4 by default) (default: 4)
–viewsAsCollections dump views as normal collections with their produced data, omitting standard collections
注意到
-o, –out=<directory-path>
是路径,所以去:
➜ local_export git:(master) ✗ mongodump -d storybook -o .
2018-10-26T17:32:52.169+0800 writing storybook.scholastic to
2018-10-26T17:32:52.170+0800 writing storybook.main to
2018-10-26T17:32:53.356+0800 done dumping storybook.main (51785 documents)
2018-10-26T17:32:53.409+0800 done dumping storybook.scholastic (51785 documents)
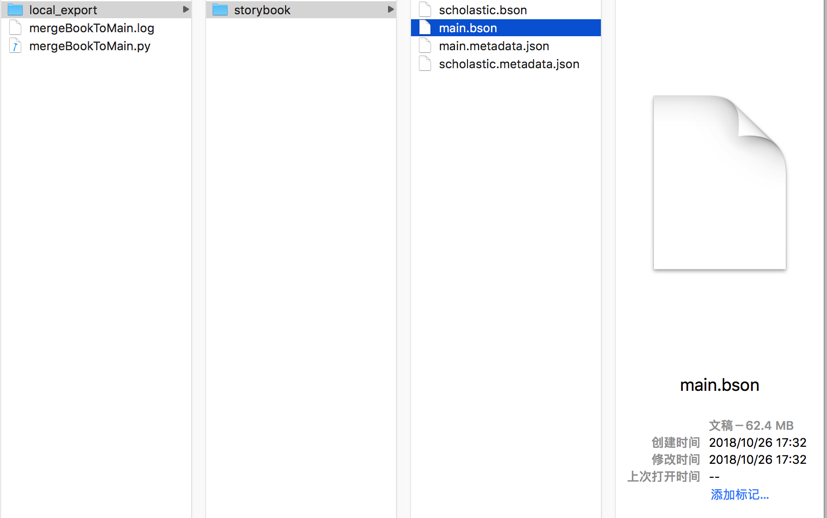
➜ local_export git:(master) ✗ ls -lha ./storybook
total 251792
drwxr-xr-x 6 crifan staff 192B 10 26 17:32 .
drwxr-xr-x 3 crifan staff 96B 10 26 17:32 ..
-rw-r–r– 1 crifan staff 60M 10 26 17:32 main.bson
-rw-r–r– 1 crifan staff 128B 10 26 17:32 main.metadata.json
-rw-r–r– 1 crifan staff 62M 10 26 17:32 scholastic.bson
-rw-r–r– 1 crifan staff 134B 10 26 17:32 scholastic.metadata.json

所以就导出所有的数据了,保存为bson格式的。
然后再去想办法导入到在线数据库
➜ local_export git:(master) ✗ mongorestore –help
Usage:
mongorestore <options> <directory or file to restore>
Restore backups generated with mongodump to a running server.
Specify a database with -d to restore a single database from the target directory,
or use -d and -c to restore a single collection from a single .bson file.
See http://docs.mongodb.org/manual/reference/program/mongorestore/ for more information.
general options:
–help print usage
–version print the tool version and exit
verbosity options:
-v, –verbose=<level> more detailed log output (include multiple times for more verbosity, e.g. -vvvvv, or specify a
numeric value, e.g. –verbose=N)
–quiet hide all log output
connection options:
-h, –host=<hostname> mongodb host to connect to (setname/host1,host2 for replica sets)
–port=<port> server port (can also use –host hostname:port)
ssl options:
–ssl connect to a mongod or mongos that has ssl enabled
–sslCAFile=<filename> the .pem file containing the root certificate chain from the certificate authority
–sslPEMKeyFile=<filename> the .pem file containing the certificate and key
–sslPEMKeyPassword=<password> the password to decrypt the sslPEMKeyFile, if necessary
–sslCRLFile=<filename> the .pem file containing the certificate revocation list
–sslAllowInvalidCertificates bypass the validation for server certificates
–sslAllowInvalidHostnames bypass the validation for server name
–sslFIPSMode use FIPS mode of the installed openssl library
authentication options:
-u, –username=<username> username for authentication
-p, –password=<password> password for authentication
–authenticationDatabase=<database-name> database that holds the user’s credentials
–authenticationMechanism=<mechanism> authentication mechanism to use
uri options:
–uri=mongodb-uri mongodb uri connection string
namespace options:
-d, –db=<database-name> database to use when restoring from a BSON file
-c, –collection=<collection-name> collection to use when restoring from a BSON file
–excludeCollection=<collection-name> DEPRECATED; collection to skip over during restore (may be specified multiple times to exclude
additional collections)
–excludeCollectionsWithPrefix=<collection-prefix> DEPRECATED; collections to skip over during restore that have the given prefix (may be specified
multiple times to exclude additional prefixes)
–nsExclude=<namespace-pattern> exclude matching namespaces
–nsInclude=<namespace-pattern> include matching namespaces
–nsFrom=<namespace-pattern> rename matching namespaces, must have matching nsTo
–nsTo=<namespace-pattern> rename matched namespaces, must have matching nsFrom
input options:
–objcheck validate all objects before inserting
–oplogReplay replay oplog for point-in-time restore
–oplogLimit=<seconds>[:ordinal] only include oplog entries before the provided Timestamp
–oplogFile=<filename> oplog file to use for replay of oplog
–archive=<filename> restore dump from the specified archive file. If flag is specified without a value, archive is read
from stdin
–restoreDbUsersAndRoles restore user and role definitions for the given database
–dir=<directory-name> input directory, use ‘-‘ for stdin
–gzip decompress gzipped input
restore options:
–drop drop each collection before import
–dryRun view summary without importing anything. recommended with verbosity
–writeConcern=<write-concern> write concern options e.g. –writeConcern majority, –writeConcern ‘{w: 3, wtimeout: 500, fsync:
true, j: true}’
–noIndexRestore don’t restore indexes
–noOptionsRestore don’t restore collection options
–keepIndexVersion don’t update index version
–maintainInsertionOrder preserve order of documents during restoration
-j, –numParallelCollections= number of collections to restore in parallel (4 by default) (default: 4)
–numInsertionWorkersPerCollection= number of insert operations to run concurrently per collection (1 by default) (default: 1)
–stopOnError stop restoring if an error is encountered on insert (off by default)
–bypassDocumentValidation bypass document validation
再去运行:
mongorestore -h HOST –port PORT -u uusseerr -p PPWWDD –authenticationDatabase storybook -d storybook ./storybook
是可以的:
➜ local_export git:(master) ✗ mongorestore -h HOST –port PORT -u uusseerr -p PPWWDD –authenticationDatabase storybook -d storybook ./storybook
2018-10-26T17:37:58.933+0800 the –db and –collection args should only be used when restoring from a BSON file. Other uses are deprecated and will not exist in the future; use –nsInclude instead
2018-10-26T17:37:58.934+0800 building a list of collections to restore from storybook dir
2018-10-26T17:37:58.964+0800 reading metadata for storybook.scholastic from storybook/scholastic.metadata.json
2018-10-26T17:37:58.964+0800 reading metadata for storybook.main from storybook/main.metadata.json
2018-10-26T17:37:58.965+0800 restoring storybook.main from storybook/main.bson
2018-10-26T17:37:59.004+0800 restoring storybook.scholastic from storybook/scholastic.bson
2018-10-26T17:38:01.809+0800 [……………………] storybook.main 2.43MB/59.6MB (4.1%)
2018-10-26T17:38:01.809+0800 [……………………] storybook.scholastic 1.25MB/61.7MB (2.0%)
…
2018-10-26T17:39:49.812+0800 [#####################…] storybook.main 53.7MB/59.6MB (90.2%)
2018-10-26T17:39:49.812+0800 [#######################.] storybook.scholastic 60.7MB/61.7MB (98.4%)
2018-10-26T17:39:49.812+0800
2018-10-26T17:39:52.120+0800 [########################] storybook.scholastic 61.7MB/61.7MB (100.0%)
2018-10-26T17:39:52.120+0800 no indexes to restore
2018-10-26T17:39:52.120+0800 finished restoring storybook.scholastic (51785 documents)
2018-10-26T17:39:52.809+0800 [######################..] storybook.main 55.0MB/59.6MB (92.4%)
2018-10-26T17:39:55.809+0800 [#######################.] storybook.main 57.4MB/59.6MB (96.4%)
2018-10-26T17:39:58.778+0800 [########################] storybook.main 59.6MB/59.6MB (100.0%)
2018-10-26T17:39:58.778+0800 no indexes to restore
2018-10-26T17:39:58.778+0800 finished restoring storybook.main (51785 documents)
2018-10-26T17:39:58.778+0800 done
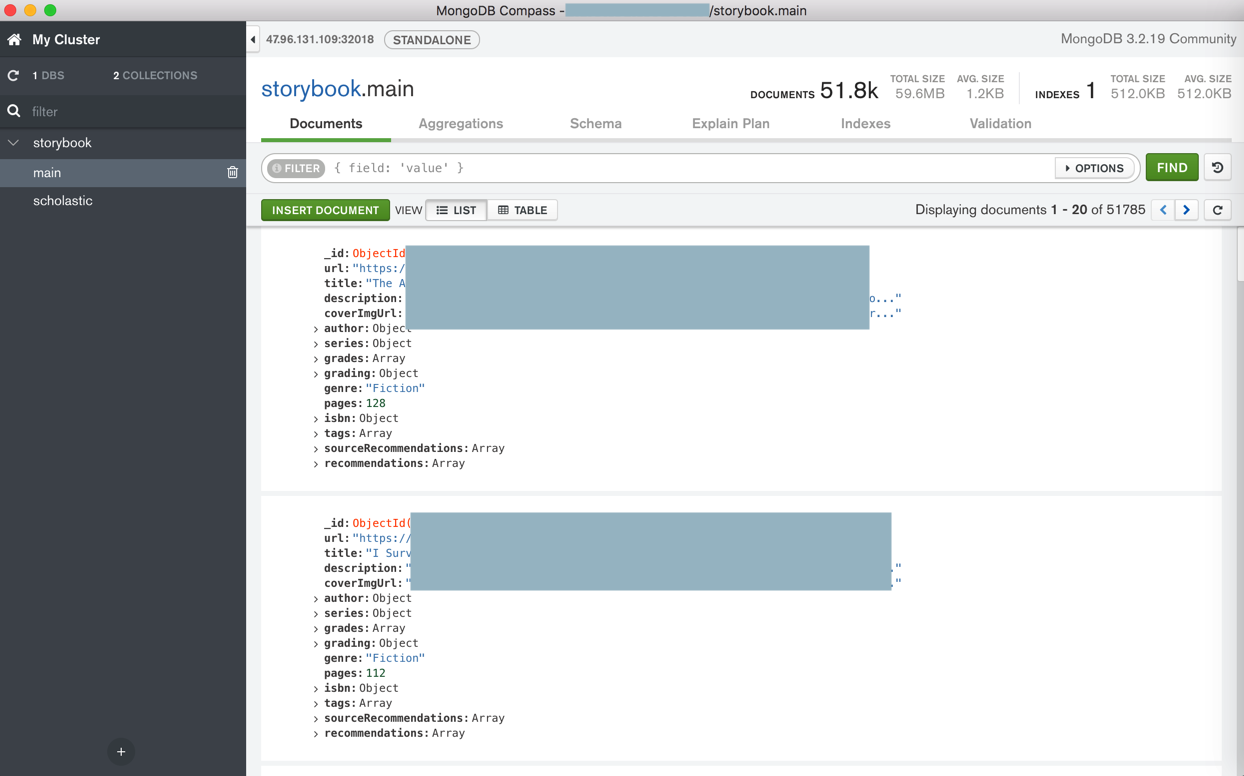
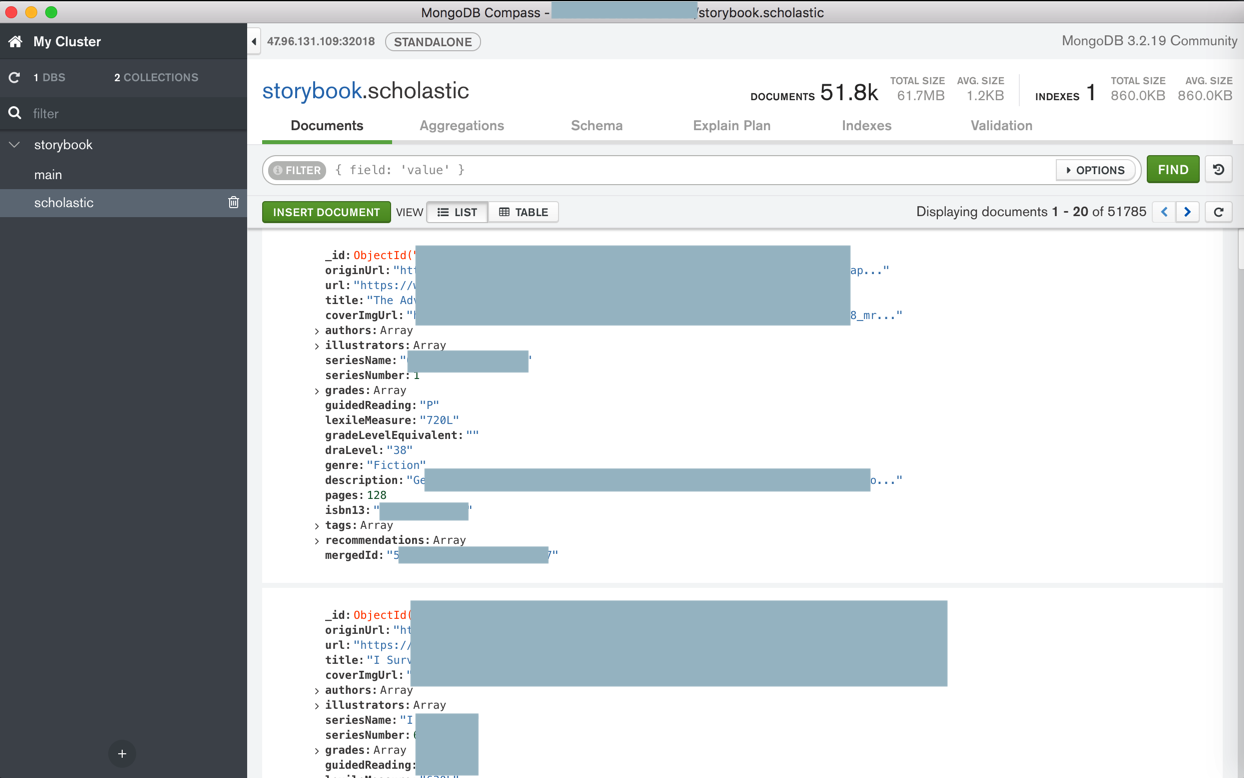
然后再去用GUI工具,比如MongoDB Compass去看看数据


就可以了。
【总结】
此处,对于:
要支持导出单个db的所有的collection
且支持MongoDB内部的更完整的数据类型:BSON
所有推荐用:mongodump/mongorestore
(而不是用:mongoimport/mongoexport)
具体操作办法是:
1.本地备份导出
在某个文件夹中:
mongodump -d db_name -o .
即可导出:
db_name
collection1.bson
collection1.metadata.json
collection2.bson
collection2.metadata.json
比如:
storybook
scholastic.bson
scholastic.metadata.json
main.bson
main.metadata.json
2.恢复导入到在线
mongorestore -h HOST –port PORT -u yourUserName -p yourPwd –authenticationDatabase yourAuthDb -d db_name ./db_name
比如:
mongorestore -h HOST –port PORT -u storybook -p PPWWDD –authenticationDatabase storybook -d storybook ./storybook
即可导入到在线的MongoDB数据库中了。
转载请注明:在路上 » 【已解决】MongoDB中用导出本地数据再用导入到在线数据库