【背景】
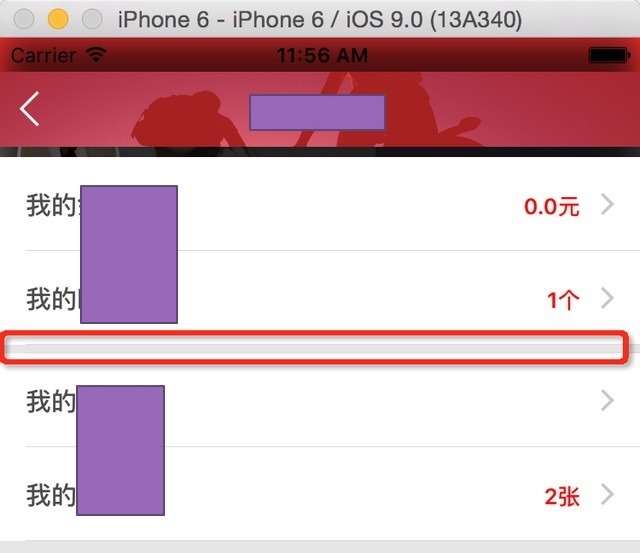
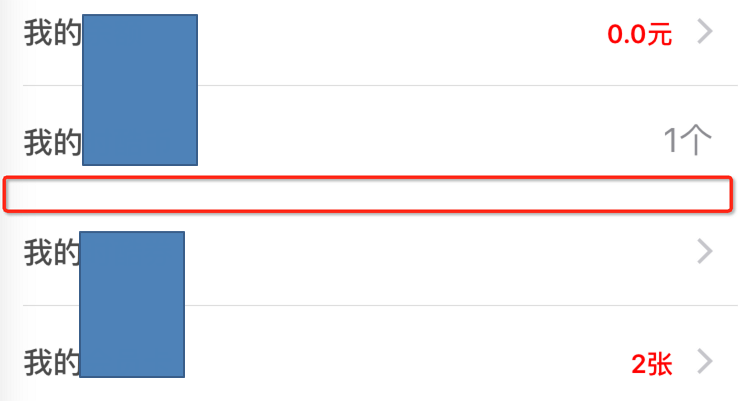
之前已经用Swift实现了列表,但是中间那个灰色的分割条,是自己多余加了一行的:
然后背景设置为灰色
但是灰色风格条上下还是有细分隔线的
看起来虽然基本还可以。
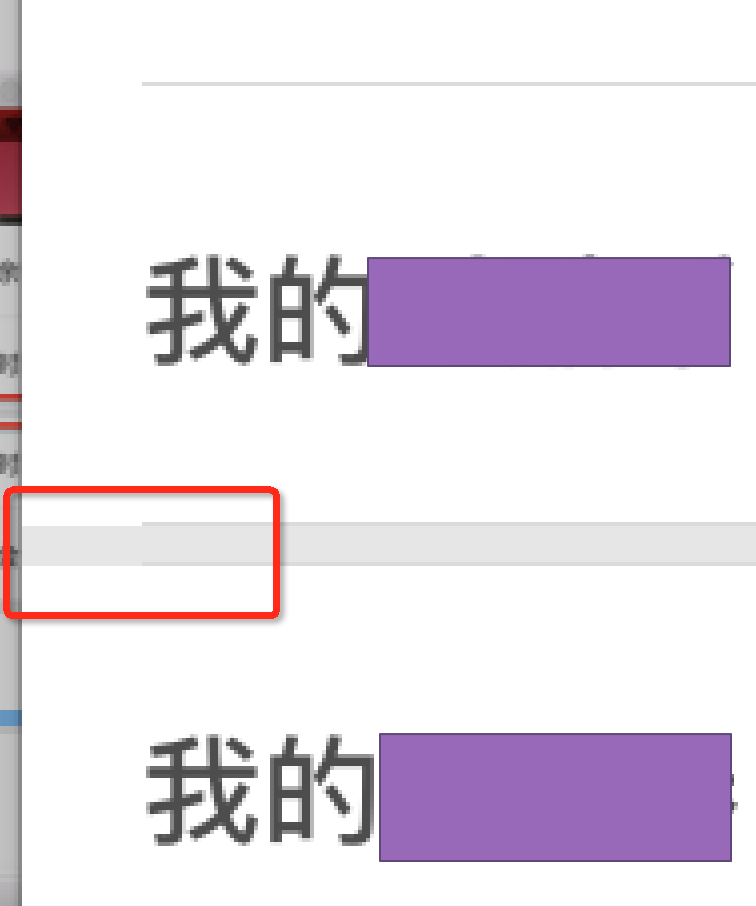
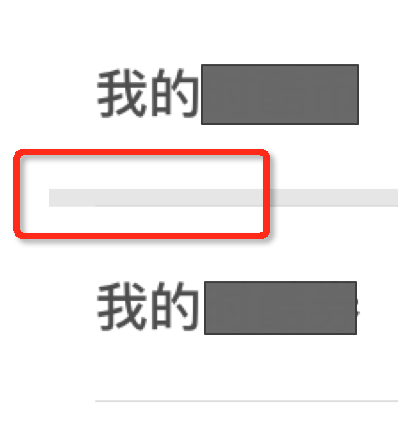
但是左边放大后,还是可以看出问题的:
可以看出是上下分割线,加上中间的灰色背景。
现在希望:
作为一个4行的table
不要用,多余的,中间插入一个没用的行,作为分割(背景设置为灰色,假装是分割条)
而是:
可以创建或者设置,真正的风格线或分割条,然后颜色设置会灰色。
去作为分隔区,这样放大也就没有那种细节的不统一和瑕疵了。
[折腾过程]
1.搜:
swift tableview separator
参考:
ios – Swift – UITableView set separator style – Stack Overflow
得知有个setSeparatorStyle,separatorStyle,去看看:
有四个和separator相关的属性。
2.看了:
separatorStylePropertyThe style for table cells used as separators.
Declaration
SWIFT
var separatorStyle: UITableViewCellSeparatorStyleOBJECTIVE-C
@property(nonatomic) UITableViewCellSeparatorStyle separatorStyleDiscussion
The value of this property is one of the separator-style constants described in UITableViewCell Class Reference.
UITableViewuses this property to set the separator style on the cell returned from the delegate intableView:cellForRowAtIndexPath:.Availability
Available in iOS 2.0 and later.
See Also
感觉或许可以:
在第二个和第三个之间,分别设置separator为none
实现我们的效果。
或者是第二个saparator设置为特殊的高度和背景色。
去试试:
The style for cells used as separators.
Declaration
SWIFT
enum UITableViewCellSeparatorStyle : Int {
case None
case SingleLine
case SingleLineEtched
}
然后没搞定。
去看了:
separatorInsetPropertyThe inset values for the cell’s content.
Declaration
SWIFT
var separatorInset: UIEdgeInsetsOBJECTIVE-C
@property(nonatomic) UIEdgeInsets separatorInsetDiscussion
You can use this property to add space between the current cell’s contents and the left and right edges of the table. Positive inset values move the cell content and cell separator inward and away from the table edges. Negative values are treated as if the inset is set to 0.
Only the left and right inset values are respected; the top and bottom inset values are ignored. The value assigned to this property takes precedence over any default separator insets set on the table view.
Availability
Available in iOS 7.0 and later.
发现这个separatorInset,是左右缩进方面的设置,不是上下行之间的分隔符的设置。
3.搜:
swift tableview custom separator
参考:
ios – Swift Tableview always showing separator lines – Stack Overflow
iphone – White space before separator line into my TableView – Stack Overflow
去试试那个:cell.separatorInset
结果不用试了,结果都是无法达到我的目的。
uitableview – How to customize tableView separator in iPhone – Stack Overflow
好像是需要去定制table的cell了。。
4.想办法,去看看能否删除,单个的cell的separator
搜:
swift tableview cell separator remove
参考:
iphone – hide separator line on one UITableViewCell – Stack Overflow
还是自定义separator的感觉。
去试试:
1 | cell.separatorInset = UIEdgeInsetsMake(0, cell.bounds.size.width, 0, 0) |
结果:
1 2 | cell.separatorInset = UIEdgeInsetsMake(0, 10000, 0, 0)cell.indentationWidth = -10000 |
结果:
或:
1 | cell.separatorInset = UIEdgeInsetsMake(0, 0, 0, cell.bounds.size.width) |
结果:
都不行。
5.然后去看了:
Property
indentationLevelThe indentation level of the cell’s content.
Declaration
SWIFT
var indentationLevel: IntOBJECTIVE-C
@property(nonatomic) NSInteger indentationLevelDiscussion
The default value of the property is zero (no indentation). Assigning a positive value to this property indents the cell’s content from the left edge of the cell separator. The amount of indentation is equal to the indentation level multiplied by the value in the
indentationWidthproperty.Availability
Available in iOS 2.0 and later.
indentationWidthPropertyThe width for each level of indentation of a cell’s content.
Declaration
SWIFT
var indentationWidth: CGFloatOBJECTIVE-C
@property(nonatomic) CGFloat indentationWidthDiscussion
The default indentation width is 10.0 points.
Availability
Available in iOS 2.0 and later.
See Also
后,添加优化后的代码:
1 2 3 4 | let indent_large_enought_to_hidden:CGFloat = 10000cell.separatorInset = UIEdgeInsetsMake(0, indent_large_enought_to_hidden, 0, 0) // indent large engough for separator(including cell' content) to hidden separatorcell.indentationWidth = indent_large_enought_to_hidden * -1 // adjust the cell's content to show normallycell.indentationLevel = 1 // must add this, otherwise default is 0, now actual indentation = indentationWidth * indentationLevel = 10000 * 1 = -10000 |
效果是:
【总结】
最后是用了如下代码:
1 2 3 4 5 6 7 8 9 10 11 12 13 14 15 16 17 18 19 20 21 22 23 24 25 26 27 28 29 30 31 32 33 34 35 36 37 38 39 40 41 42 43 44 45 46 47 48 49 50 51 52 53 54 55 | var ctrlnames = ["我的111", "我的222", "", "我的333", "我的444"] self.tableView?.backgroundColor = UIColor(hexString: "#e6e6e6") self.tableView?.separatorColor = UIColor(hexString: "#dbdbdb") self.tableView?.separatorInset = UIEdgeInsetsMake(0, 10, 0, 0) self.tableView?.separatorStyle = UITableViewCellSeparatorStyle.SingleLinefunc tableView(tableView: UITableView, cellForRowAtIndexPath indexPath: NSIndexPath) -> UITableViewCell { print("cellForRowAtIndexPath indexPath = \(indexPath)") let indentify:String = "SwiftCell" // var cell: UITableViewCell? = tableView.dequeueReusableCellWithIdentifier(indentify, forIndexPath: indexPath) as? UITableViewCell let cell = UITableViewCell(style: UITableViewCellStyle.Value1, reuseIdentifier: indentify) cell.textLabel?.text = self.ctrlnames[indexPath.row] cell.textLabel?.textColor = UIColor(hexString: "#4d4d4d") cell.textLabel?.font = UIFont.boldSystemFontOfSize(15) switch indexPath.row{ case 0: cell.detailTextLabel?.text = "0.0元" case 1: cell.detailTextLabel?.text = "1个" case 2: cell.detailTextLabel?.text = "" case 3: cell.detailTextLabel?.text = "" case 4: cell.detailTextLabel?.text = "2张" default: cell.detailTextLabel?.text = "" } if indexPath.row == 1 { let indent_large_enought_to_hidden:CGFloat = 10000 cell.separatorInset = UIEdgeInsetsMake(0, indent_large_enought_to_hidden, 0, 0) // indent large engough for separator(including cell' content) to hidden separator cell.indentationWidth = indent_large_enought_to_hidden * -1 // adjust the cell's content to show normally cell.indentationLevel = 1 // must add this, otherwise default is 0, now actual indentation = indentationWidth * indentationLevel = 10000 * 1 = -10000 }else if indexPath.row == 2 { cell.accessoryType = UITableViewCellAccessoryType.None cell.backgroundColor = UIColor(hexString: "#e6e6e6") }else{ cell.accessoryType = UITableViewCellAccessoryType.DisclosureIndicator cell.backgroundColor = UIColor.whiteColor() cell.detailTextLabel?.textColor = UIColor.redColor(); cell.detailTextLabel?.font = UIFont.boldSystemFontOfSize(13) cell.detailTextLabel?.textAlignment = NSTextAlignment.Right } return cell} |
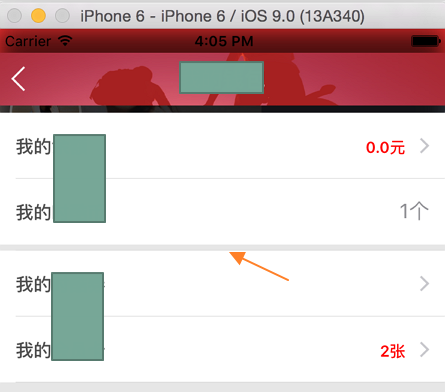
去实现了,在第二行后面,添加一个多余的空的row去实现对应的效果的:
相关部分的放大看,也是没有瑕疵和多余的separator干扰的:
【后记】
还是需要解决,不允许用户点击那个分割行:
